In principle, nearly all sewing machines work the same way.
As I move forward with The Sewing Machine Newsletter, this will be a theme that pops up over and over again. It’s equally important that you thread the take-up lever on your 1941 Singer Featherweight as it is your new 2022 Bernina 770 Plus. It’s equally important you don’t sew with a bent needle. It’s equally important you thread your machine with the presser foot in the raised position. Etc, etc.
With that in mind, this edition of the newsletter will cover a basic aspect of sewing machine maintenance that applies to all machines: cleaning out compacted lint. It’s something you can do at home with just a couple of different tools and I’m a believer that it goes a long way in helping you maintain your machine.
First, Addressing The Canned Air Discourse…
Floating around the ether of the sewing machine world is the misconception that blowing out your machine with canned air is bad for the machine itself. I have heard people say that it can dislodge wires and mess up the electronics. They say it’s bad because it blows lint deeper into the machine. They claim it actually damages the machine.
This is simply not true.
Take it from me, my father, my uncle, the other techs who work with us— we use the power of air to clean lint out of the machines we service. Air clears out nooks and crannies you can’t see. It reaches places your lint brush could never reach. At our shop we use a super powerful air compressor to blow lint out of machines. For your home use, a can of compressed air will do just fine.
(1) Hook Mechanism
Whether you have a vertical front loading bobbin system (think Bernina) or a horizontal rotary hook drop-in bobbin system (think Janome, Brother, Baby Lock), you will definitely find lint build up in your hook mechanism beneath the bobbin case.
It’s important to clean this area because lint buildup beneath the bobbin case can jar the bobbin case out of position. No matter your machine, if the bobbin case is jarred out of position, there’s a good chance it will wander into the path of the needle. The needle will strike the bobbin case, damage the bobbin case, and potentially throw your machine out of time. It’s something you definitely want to avoid, and cleaning out that compacted lint is a way you can prevent it.
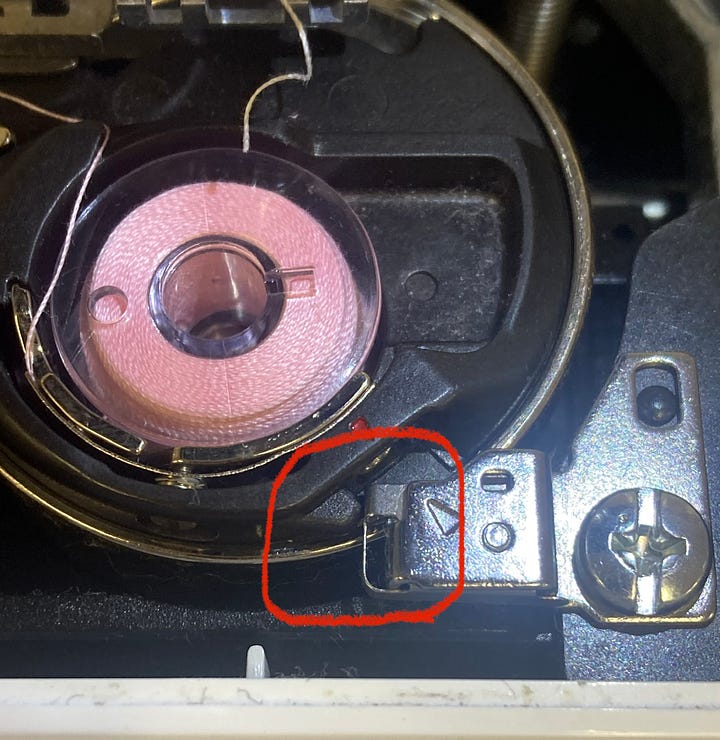
Top Left Photo: circled in red, a small nipple protruding from the black bobbin case sits flush with a square metal spring. This is square metal spring is called the bobbin case positioning bracket, and it helps keep the bobbin case seated in the proper position as the machine sews.
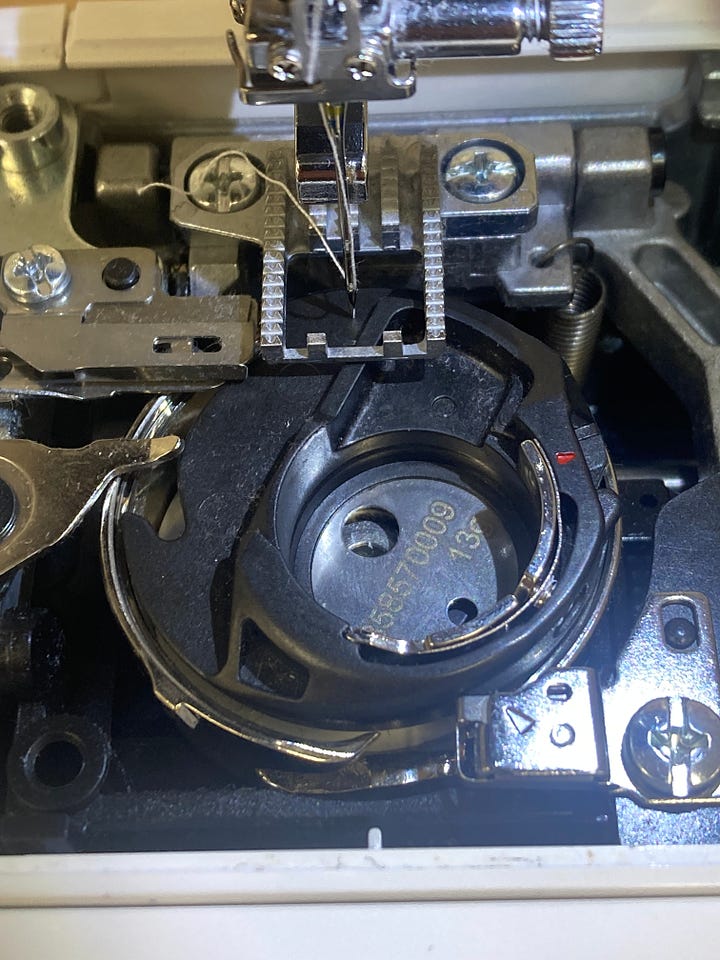
Top Right Photo: the bobbin case nipple has passed over the bobbin case positioning bracket. Now the bobbin case is out of position and is destined to be struck by the needle.
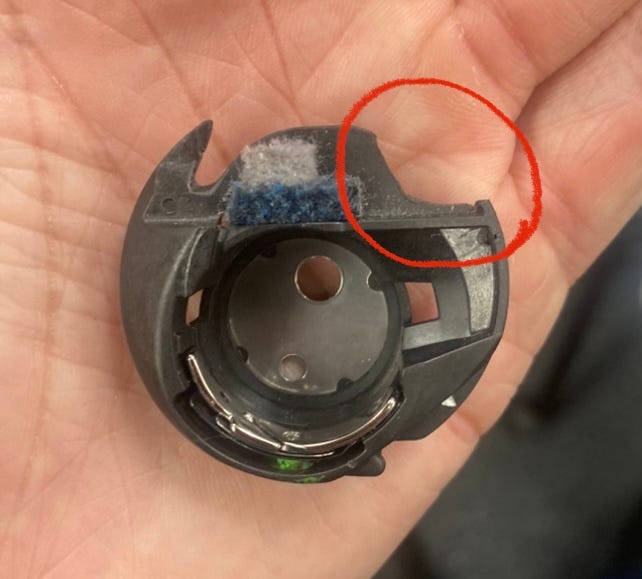
Bottom Left Photo: an example of a bobbin case that suffered severe damage from a needle strike. A huge chuck is missing. The owner of the machine needs a new bobbin case.
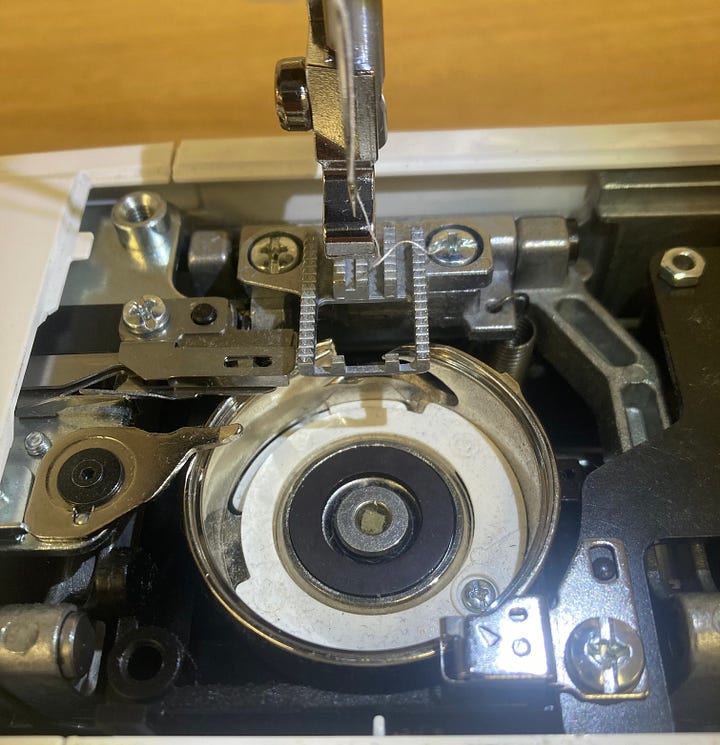
Bottom Right Photo: underneath the bobbin case. You are able to remove the bobbin case completely and clean out any lint that has gathered underneath.
(2) Bobbin Case Tension Discs
A fairly common thing I see is someone who brings in their machine because they are getting small loops (a.k.a. eyelashes) on the top side of their fabric. These small loops indicate that the bobbin thread is not under tension, something our technicians refer to as zero tension condition. Often this is due to user error, when the sewist accidentally does not slide their bobbin thread between the bobbin case tension discs properly. However, many times they did thread the bobbin case correctly, and there is still a zero tension condition. When this happens I take a close look between the bobbin case tension discs (thin silver discs circled in red in the photos below).
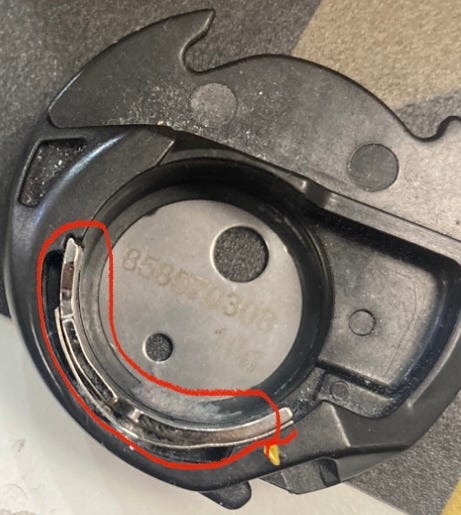
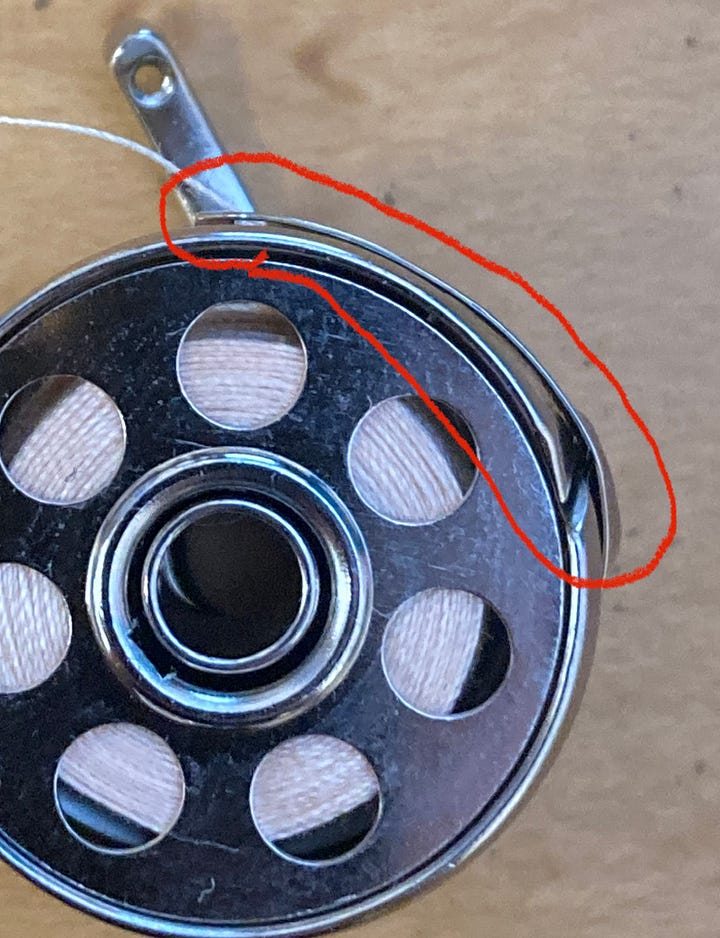
If compacted lint and thread gets stuck between those discs, the discs will not close properly. If the discs don’t close properly, then the bobbin thread will have zero tension and get sucked up to the top of the fabric.
Often the lint gets so compacted that I can’t see it with the naked eye. But, because of my experience and the experience of those who taught me, I know there is something stuck in there, even if I can’t see it.
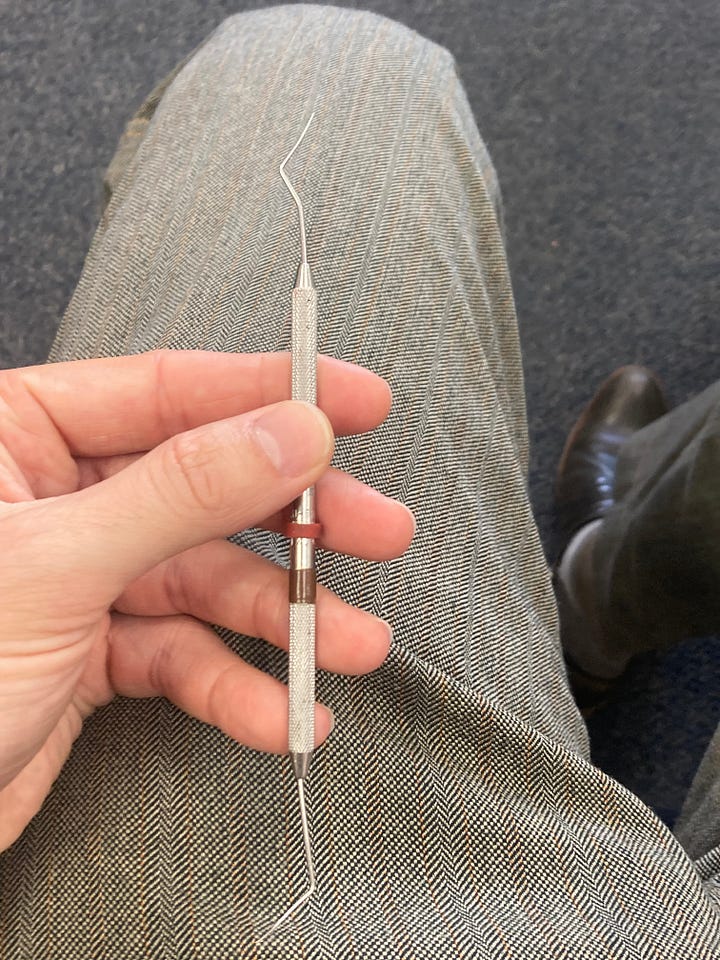
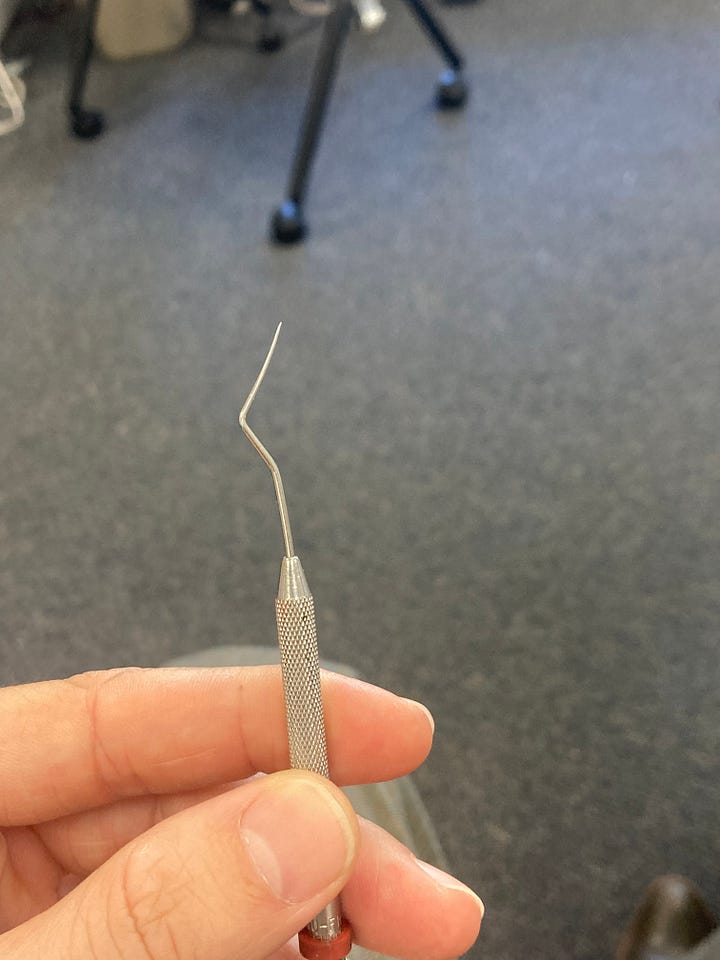
When cleaning your machine, blow some canned air between your bobbin case tension discs as a precautionary measure. If you ever get loops on the top side of your fabric and you realized you have zero tension condition, canned air may not be enough. Fishing around with a pin or needle might be more effective. My favorite tool is actually a dental tool used to scrape plaque off teeth. The thin rigid pick does a great job digging out thread and lint from those tiny hard-to-reach tension discs.
(3) Upper Tension Discs
Just like I talked about with the bobbin case tension discs, compacted lint/thread wedged between the machine’s upper tension discs can cause a zero tension condition with the top thread. Whereas zero tension condition in the bobbin case causes loops on the top side of the fabric, zero tension condition for the upper thread will result in loops (eyelashes) on the underside of the fabric.
Where are your upper tension discs?
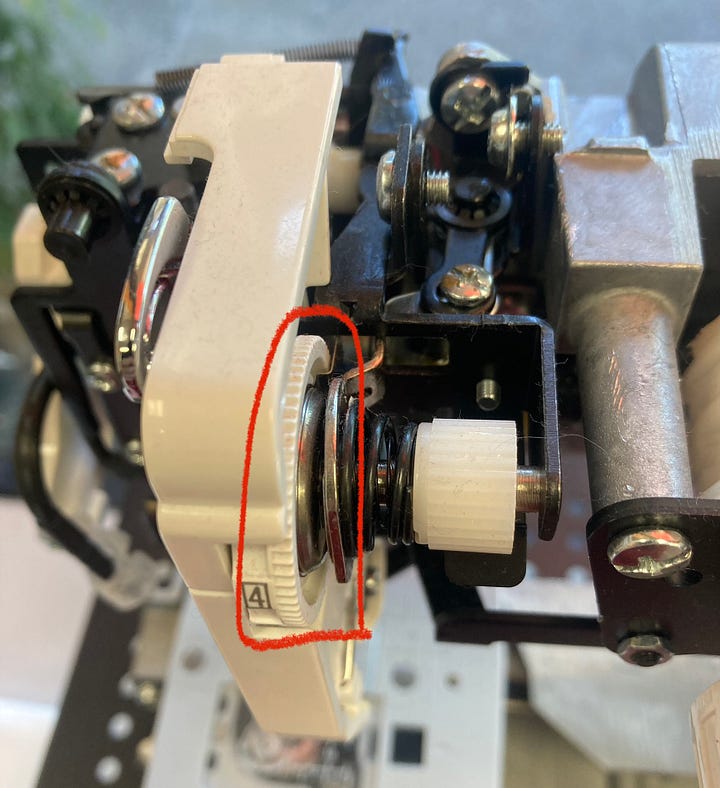
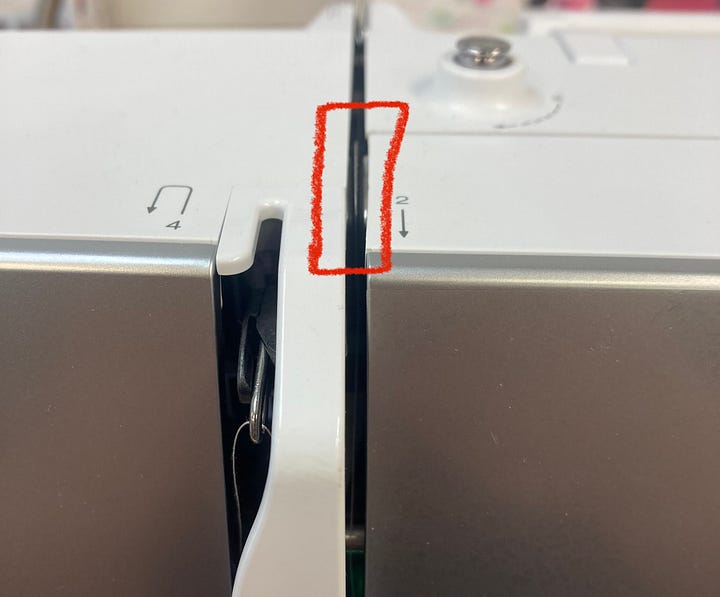
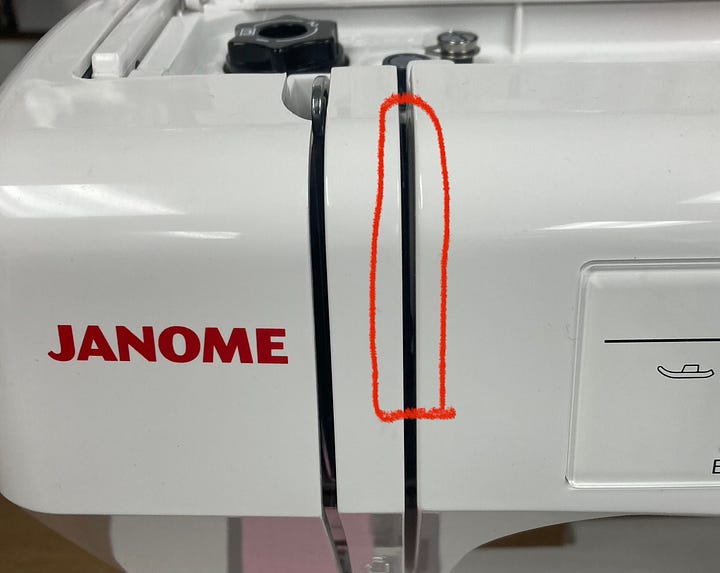
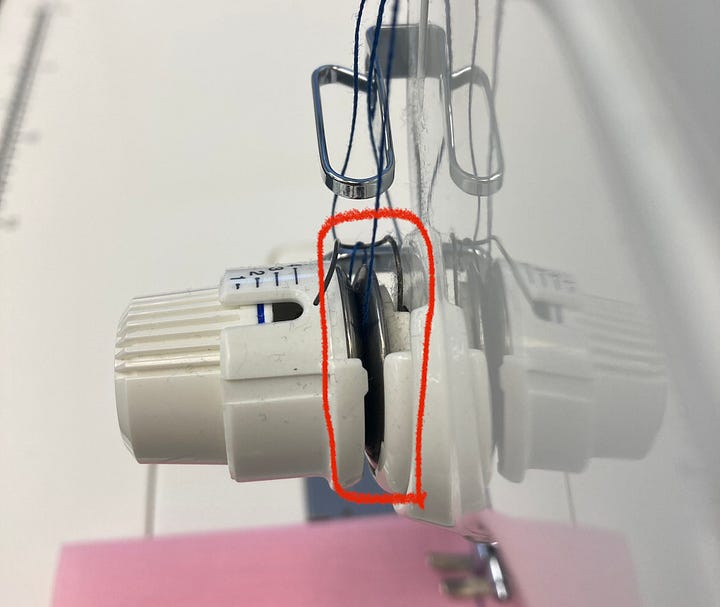
When the presser foot is in the raised position, the tension discs are open. When the presser foot is lowered, the tension discs are closed. To clean out the upper tension discs, raise your presser foot to the up position. Then, with your canned air, blow out the space between your tension discs.
(4) Feed Dogs
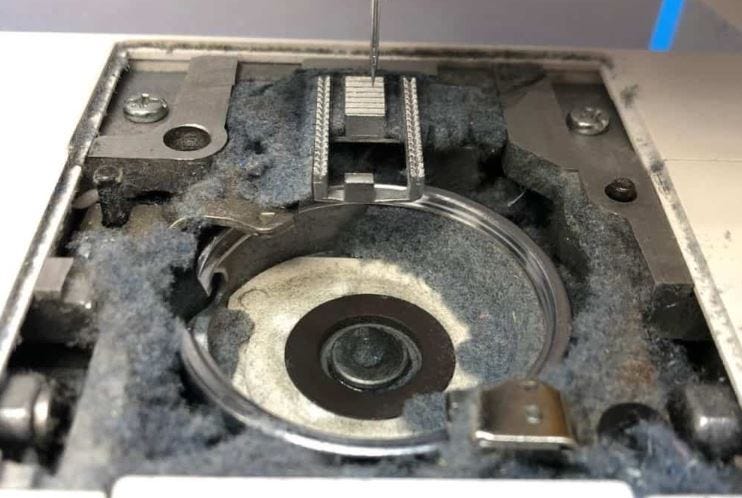
Remove your needle needle plate and examine your feed dogs. Specifically, examine the grooves in between the feed dog teeth. It’s a prime area for compacted lint to build up.
With your canned air or lint brush, clean between the feed dogs and clear out that compacted lint.
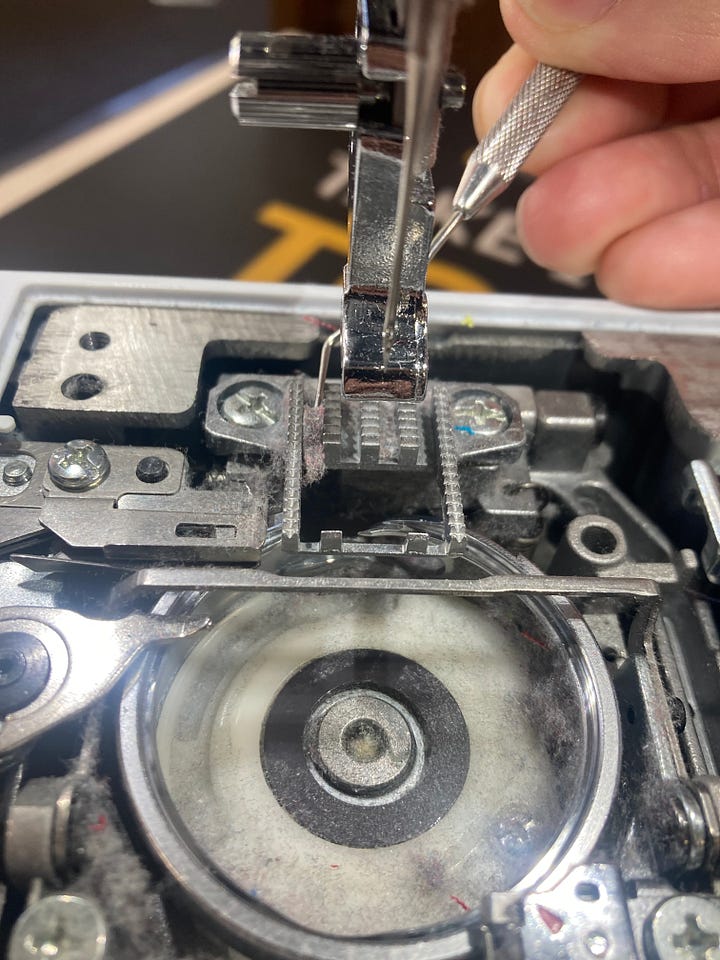
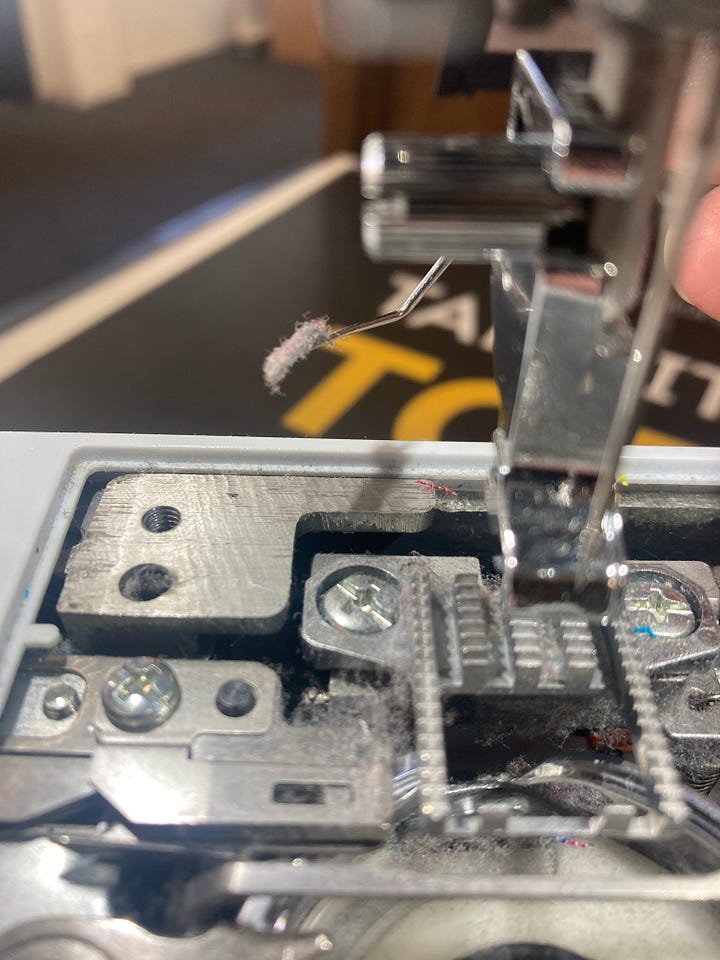
Why is cleaning out this area important? I have seen machines come in for service where the sewist complains that their machine isn’t feeding fabric well. Upon closer inspection, the feed dogs look low; they barely rise above the needle plate, so it’s no wonder they cant grip the fabric adequately. However, when I take off the needle plate I see compacted lint in the feed dogs. The lint has gathered up so much that the lint is actually pushing the needle plate upward. The feed dogs aren’t low; the needle plate is high. If you remove that compacted lint, then the feed dog height should improve, though further adjustment still may be needed. That’s why you want to prevent compacted lint in the first place with preemptive cleaning
(5) Needle Threader
At the epicenter of your machine’s needle threader is a tiny wire hook that passes in and out of the needle eye. As you can see in the photos below, lint can get caught around that tiny wire hook. When it does, there is good chance that your needle threader will not work properly. Occasionally blow out your needle threader with canned air to prevent lint buildup from happening.
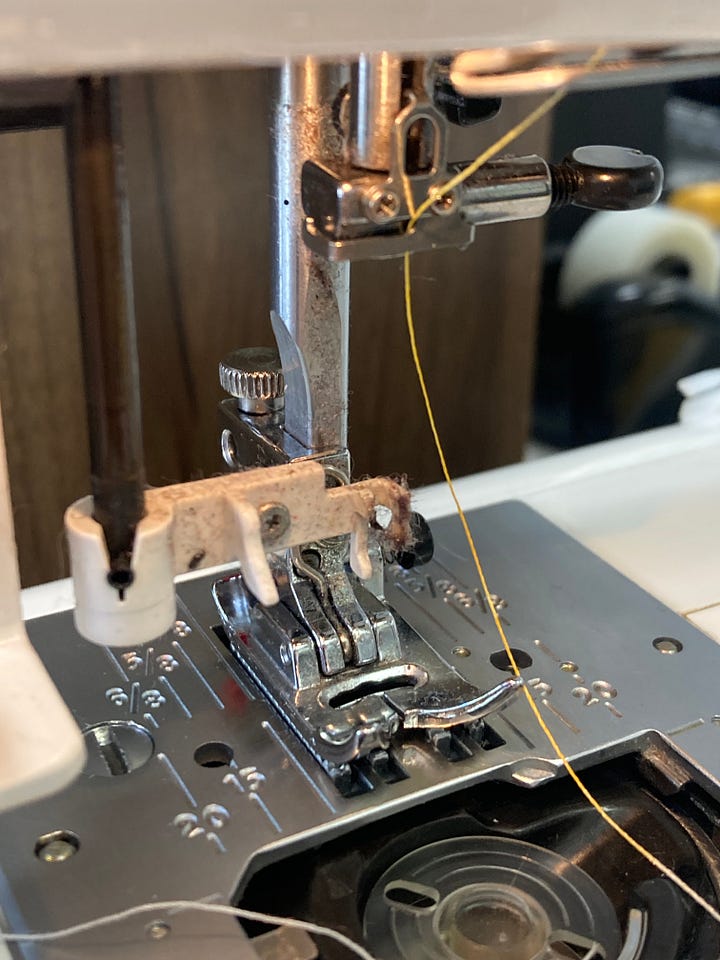

If you are new to the newsletter, we have covered needle threaders in detail in two of our previous articles:
NEEDLE THREADER, PART 1
NEEDLE THREADER, PART 2
In Conclusion…
I hope you found this information helpful. As you saw, some of the photos in this newsletter had intense lint buildup. If you clean your machine regularly, you will rarely (if ever) see this kind of compacted lint.
Please let me know
-Cale



Thank you for the freedom to used canned air without guilt! I’ve been doing it for years, and it is so helpful at getting the last bits of lint that are hiding out of sight. Your newsletters are so, so helpful, keep them coming!!
Thank you, Cale, for these very informative posts. I’ve learned a lot. And you are an excellent writer. (I’m a published writer and a former English teacher, so I know whereof I speak. 🙂