Greetings everybody,
Today I want to quickly cover some of the keys to needle insertion.
I hope you find it helpful.
-Cale
(1) Flat to the Back
If you look at the base end of the needle, you’ll notice that one side is round and the other side is flat.
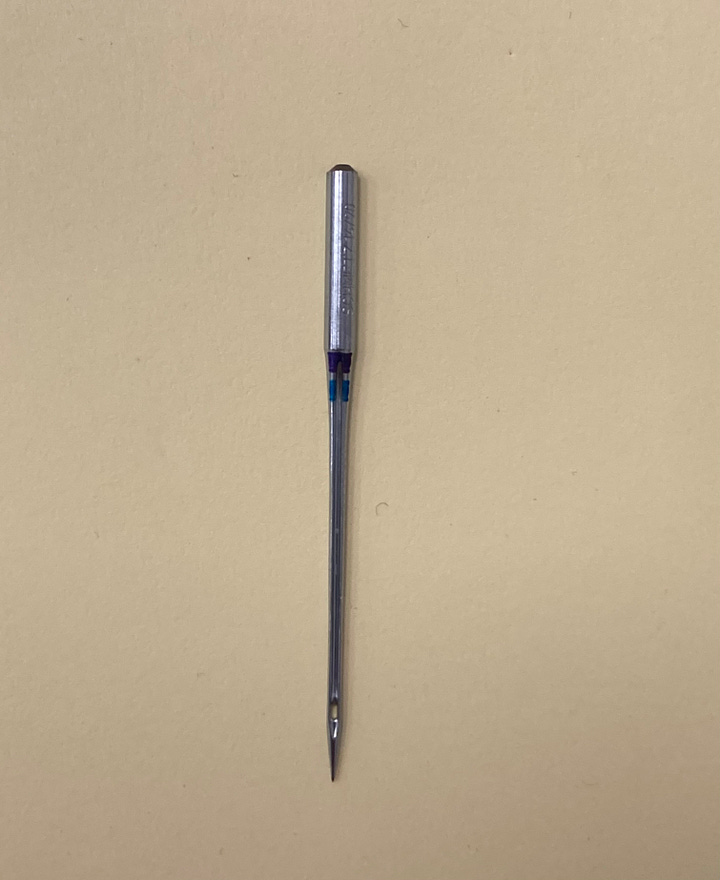
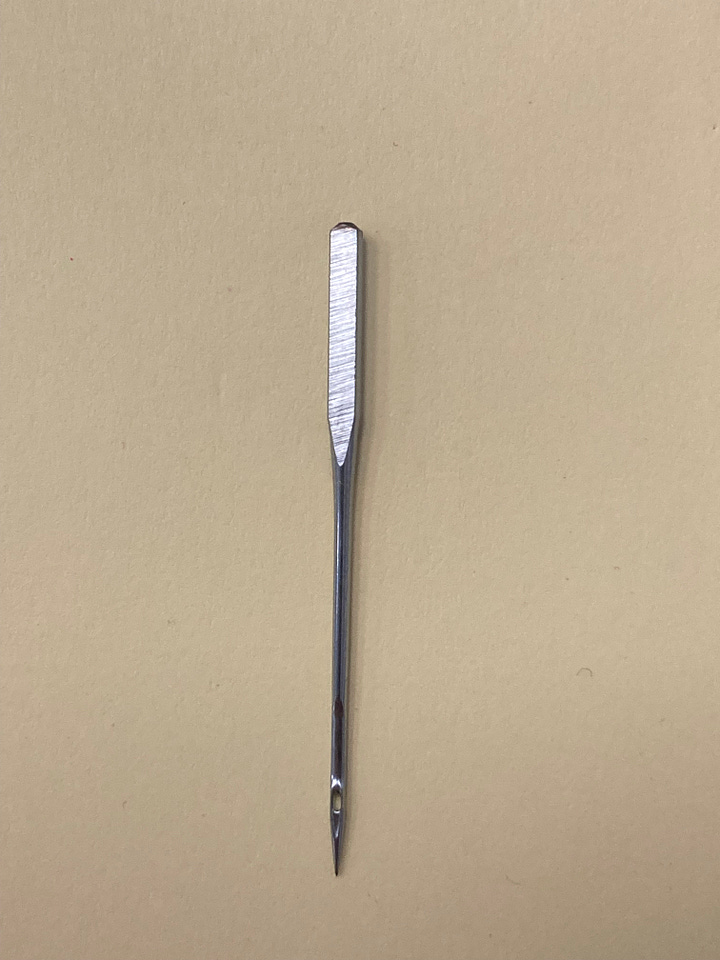
On the vast majority of home sewing machines, the flat side of the needle must face the back of the machine when you insert the needle into the needle clamp. Another way to think of it is that the flat side faces away from you and the round side faces toward you.
Flat to back.
Notable exceptions include semi-industrial straight stitch machines, such as the Juki TL-2010 & TL-18, Baby Lock Accomplish, Brother Nouvelle, Janome HD9 & 1600P, Pfaff Grand Quilter, and Viking Mega Quilter. Because these machines are side-loading bobbins, the flat faces the right.
Another notable exception is the Singer Featherweight, in which the flat faces the left.
Why is it so important that the flat side faces the correct direction?
When a sewing machine makes a stitch, a thread loop forms behind the eye of the needle as the needle begins to rise upward from its bottommost position. As that loop forms, the machine’s hook point passes behind the needle, just above the eye, and catches the thread loop.
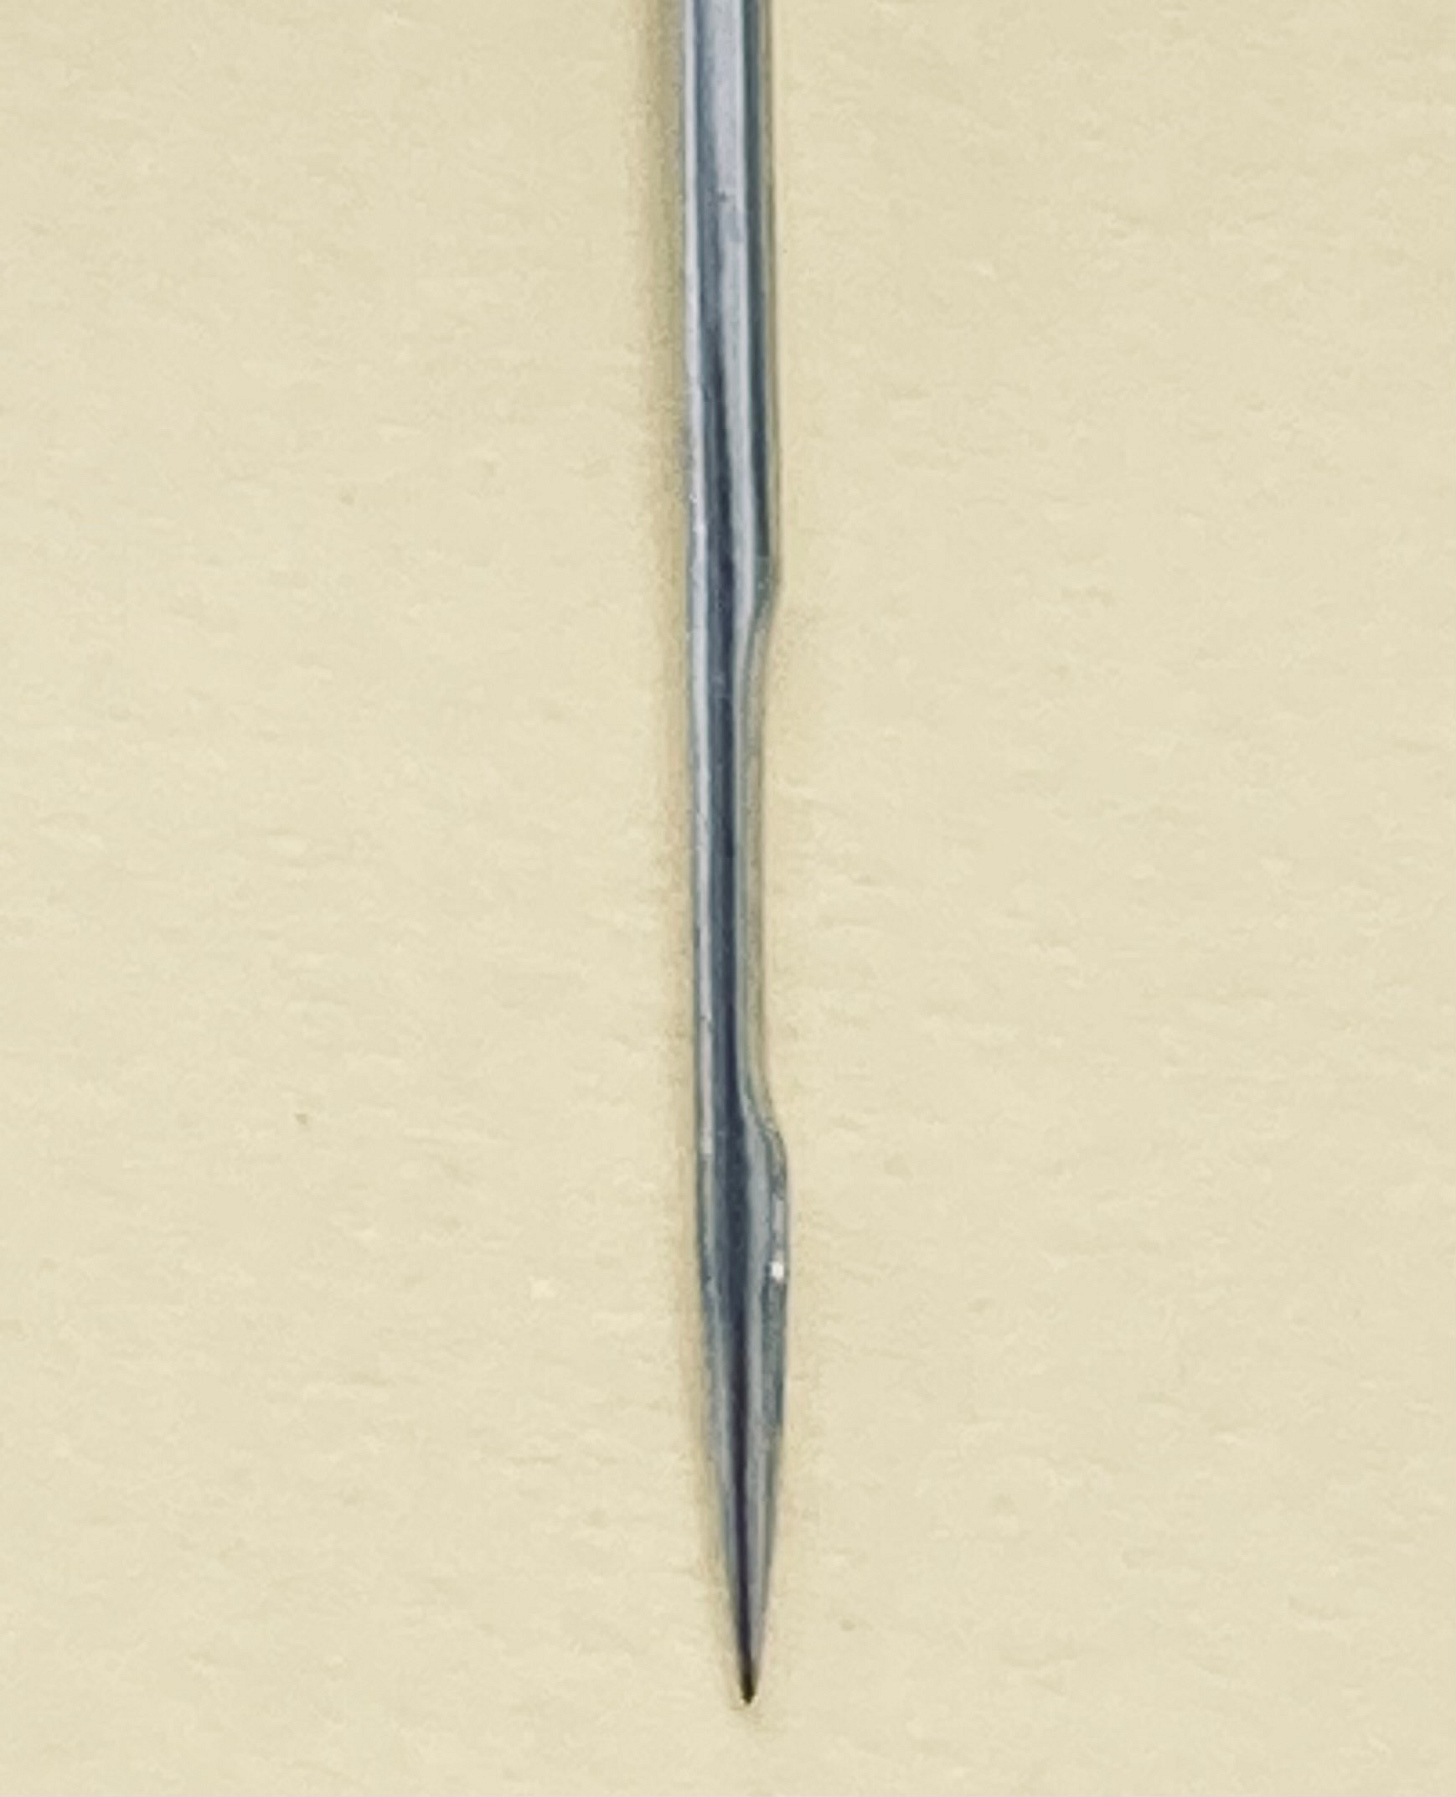
Let’s zoom in on a needle from the profile view:
There is a cut-out on the backside of the needle just above the needle eye. When you place the flat to the back, it orients the needle so that the hook passes behind the cut out. This is crucial for stitch formation, because the cut out increases the size of the thread loop, and therefore increases the chances that the hook passes through the loop successfully and decreases the likelihood of skipped stitches.
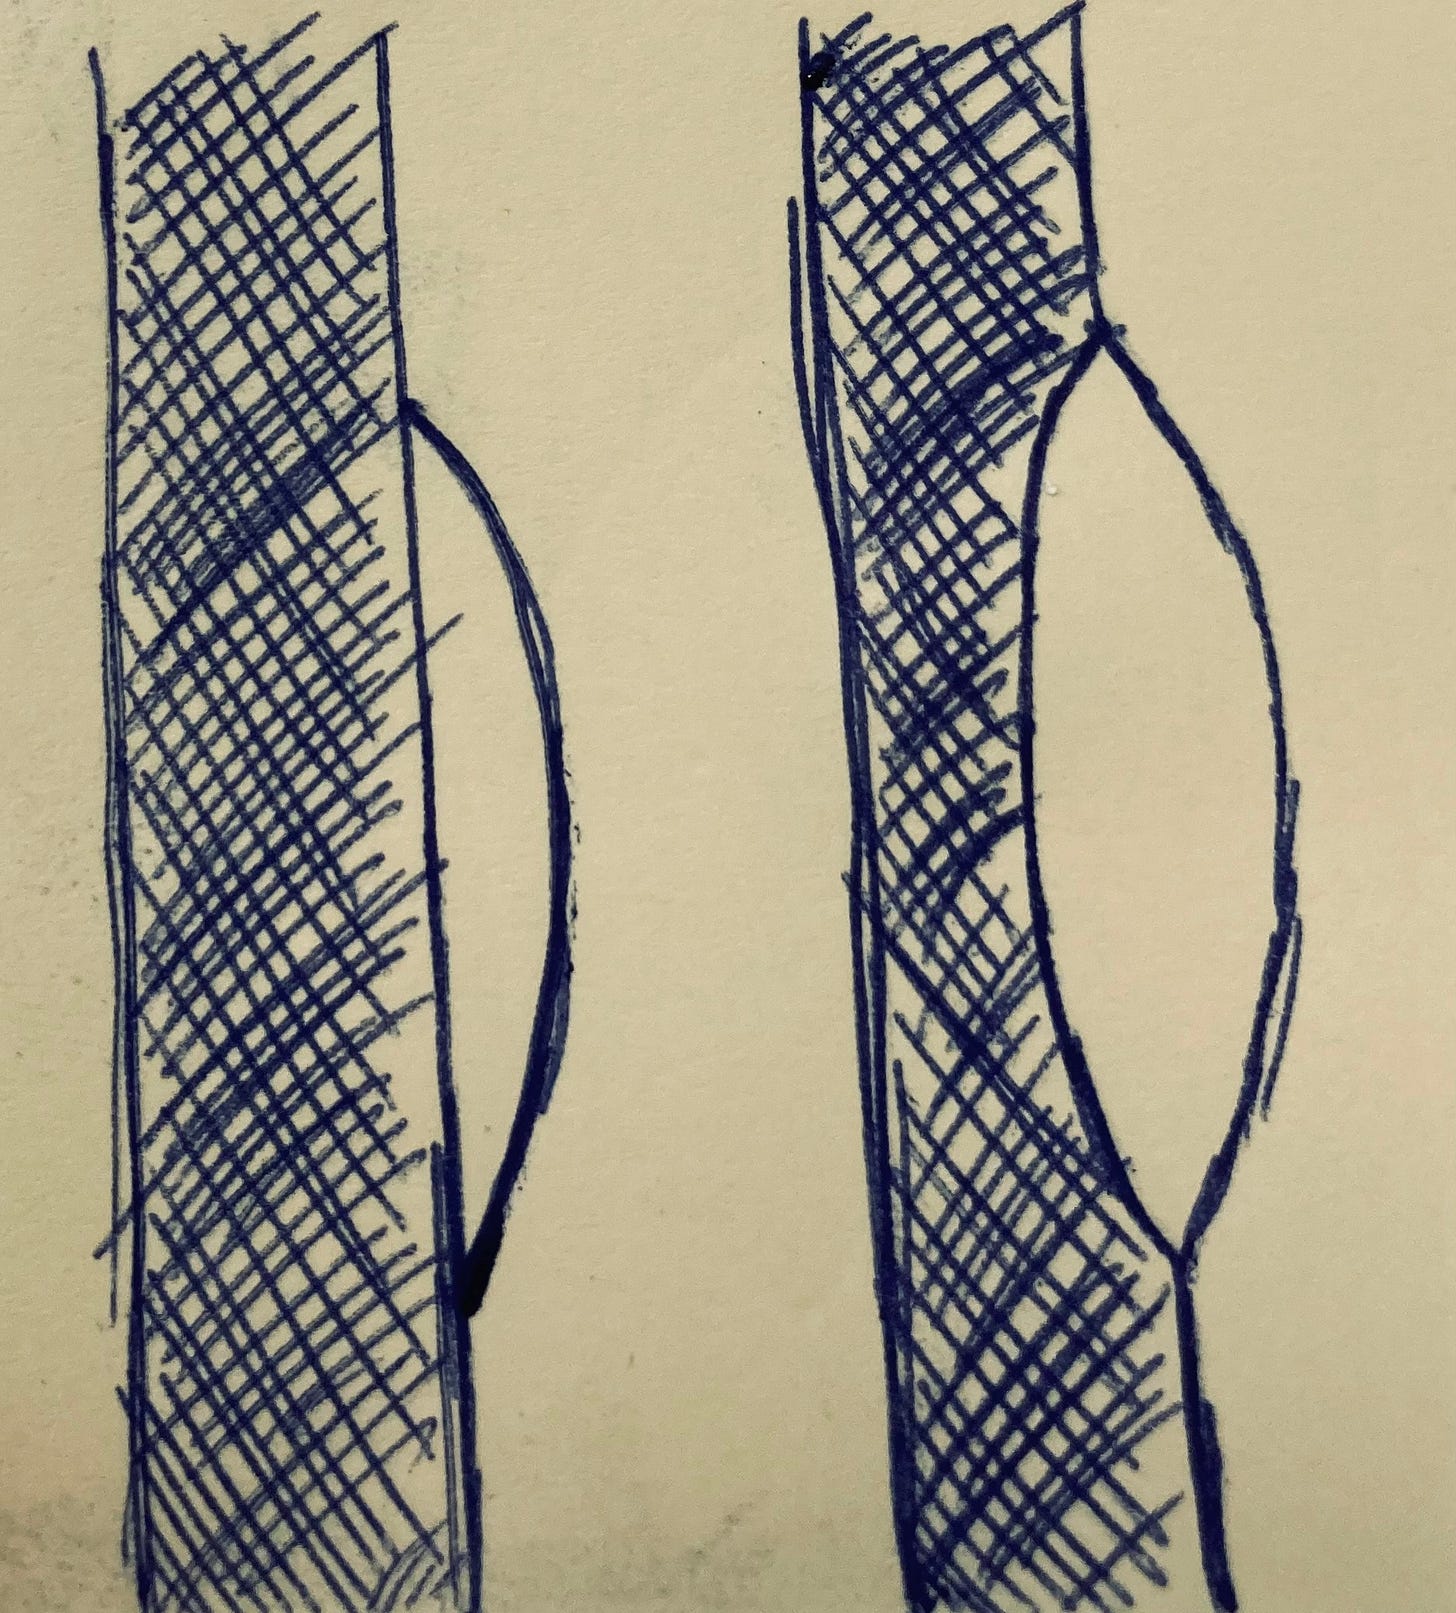
Excuse the crudeness of my drawing above, in which I attempt to draw two needles (crosshatched shading) with thread loops forming on the backside. The needles are in the profile view, as if we are looking at it from the perspective of the hook point approaching a thread loop.
On the left is a needle without a cut-out. Because there is no cut-out, the thread loop forms against a flat vertical needle shaft, so the loops appears as half an oval.
On the right is a needle with a cut-out. Because the thread loop forms against the cut-out, the thread loop appears larger to the hook point. There is a larger target for the hook to pass through, and therefore a decrease in likelihood for skipped stitches. That is why the cut-out exists on all needles. That is why you must insert the needle with the flat to the back.
(2) Slide the Needle up all the way
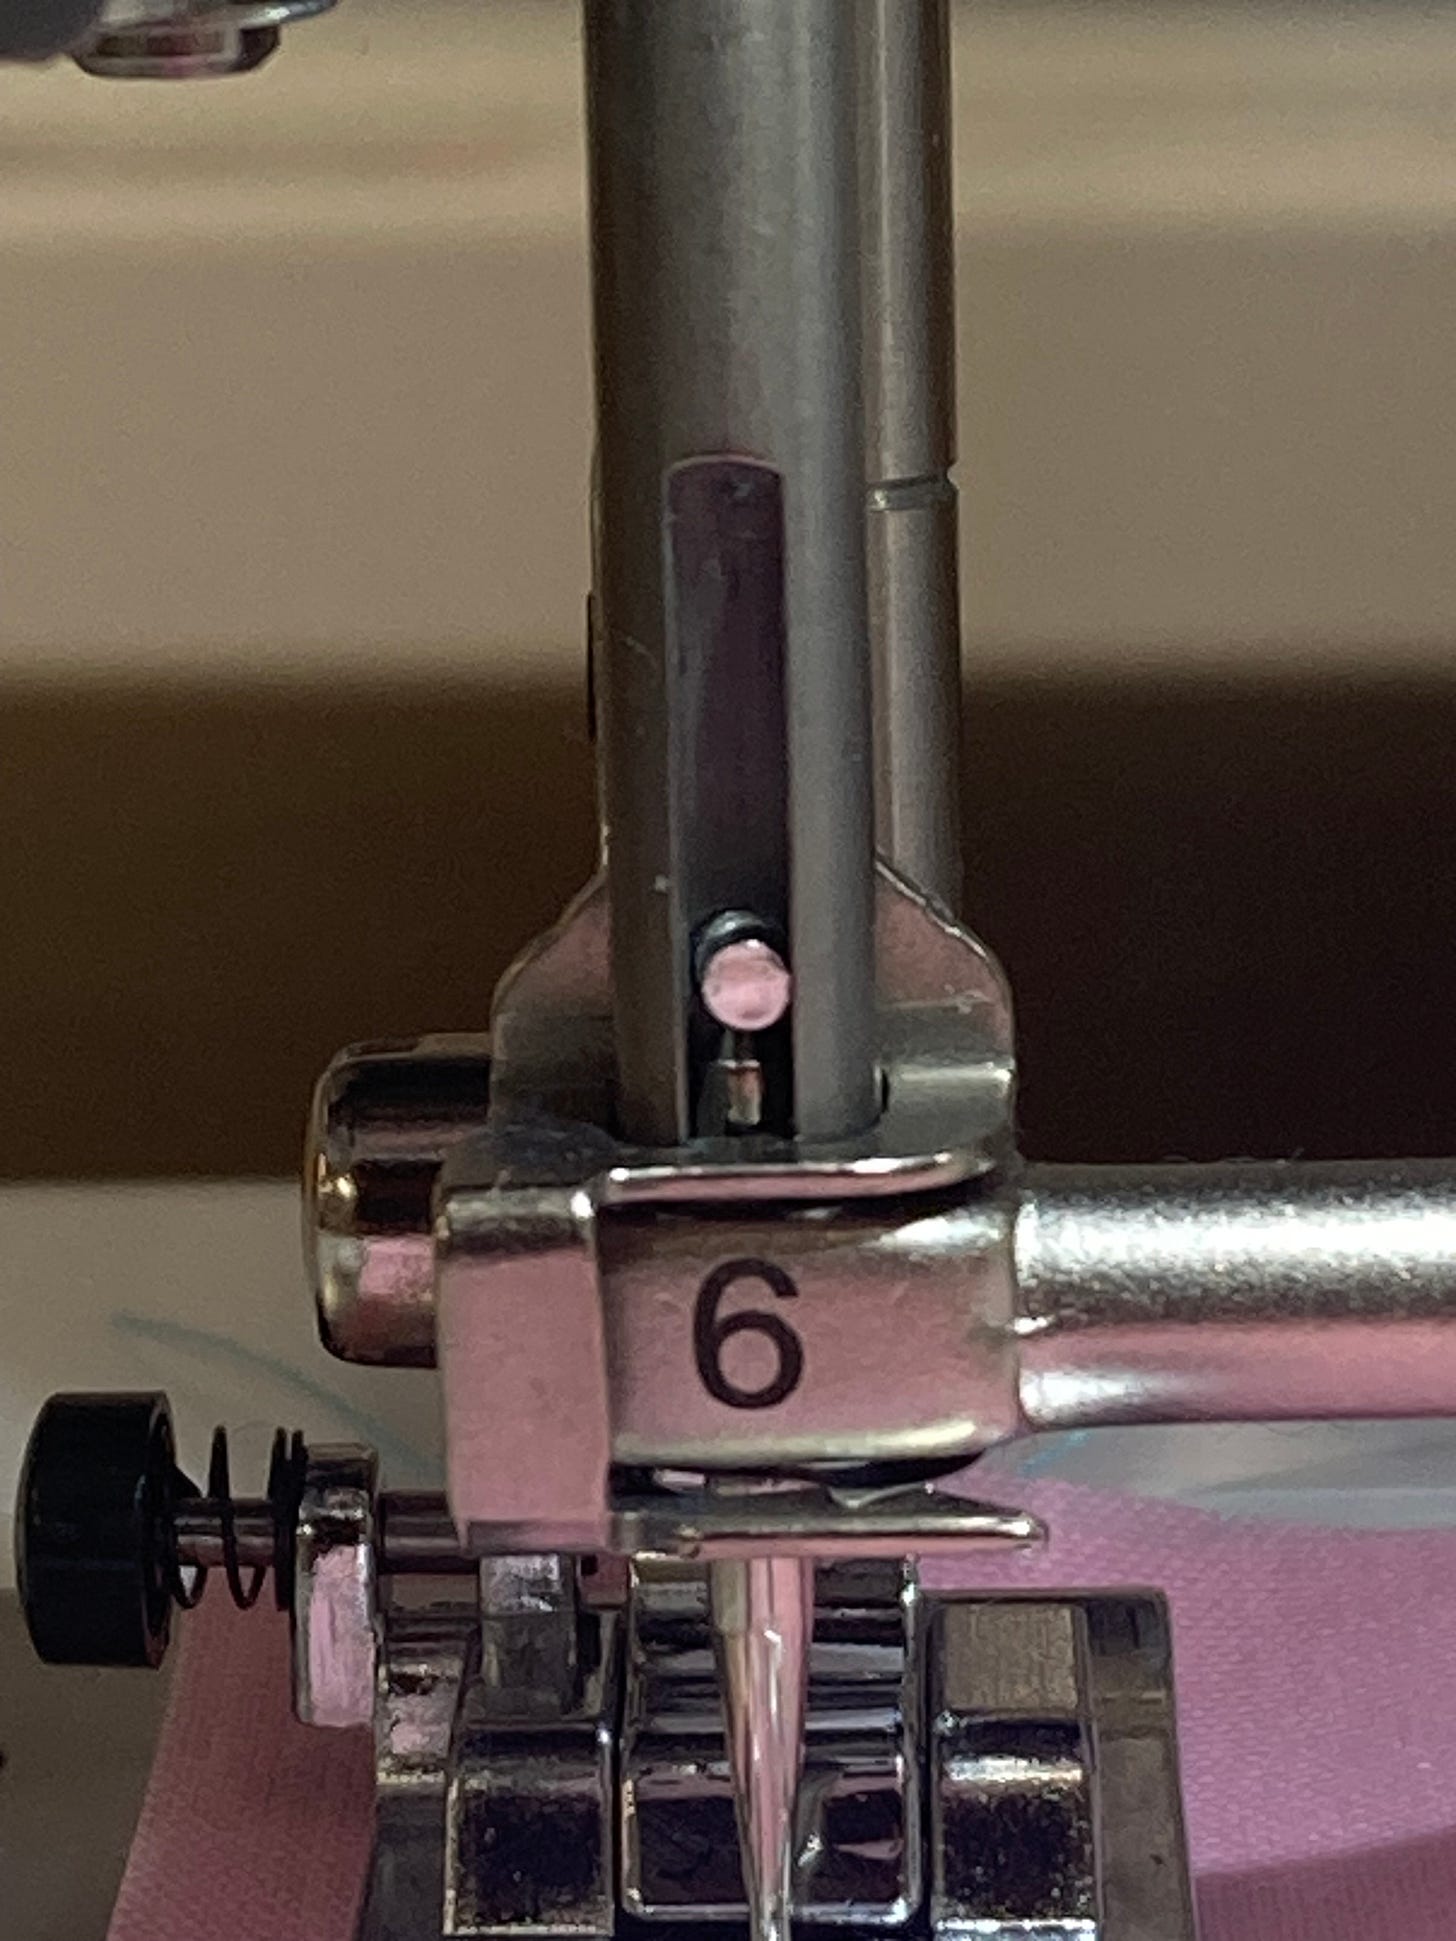
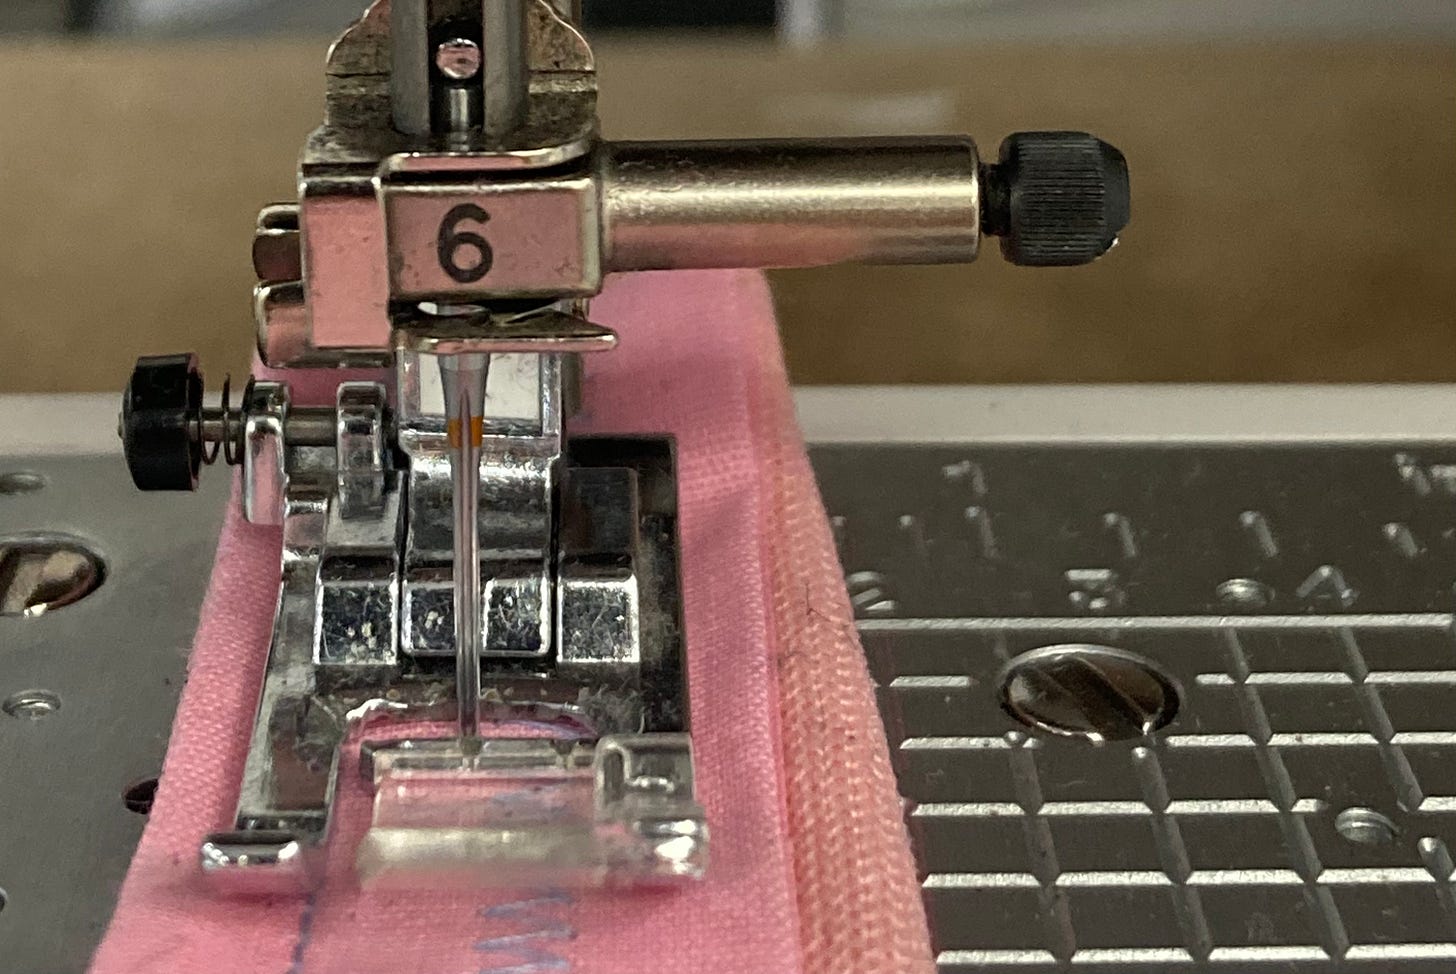
When you insert the needle into the needle clamp, it is important that you slide the needle all the way in before tightening the set screw. As you can see in the photo below, there is a pin within the needle bar. When you insert the needle, it should slide up all the way until it hits the pin.
A relatively common issue I see with needle insertion is that the user does not slide the needle up all the way up to the pin. This can cause skipped stitches and other issues, such as the needle scraping the floor of the hook mechanism.
Remember, in order for the machine to make a successful stitch, the hook point passes behind the needle just above the needle eye. However, if the needle is not inserted all the way into the clamp, the hook will pass at a different point on the needle, which can potentially cause skipped stitches.
(3) Don’t Overtighten the Needle Screw
After you insert your needle into the needle clamp, you tighten the needle screw so that the needle stays in place. Most of these screws can be tightened with your fingers; however, there’s not a ton of real estate in that needle clamp area, so the screw is also designed so that you can tighten it with a screwdriver.
It is very very very VERY important that we don’t overtighten the needle clamp screw. It is a set screw, meaning that the screw merely pushes up against the needle and pins the needle firmly in place. It only needs to be tight enough to pin the needle. Anything beyond that is unnecessary and can potentially cause harm to the machine.
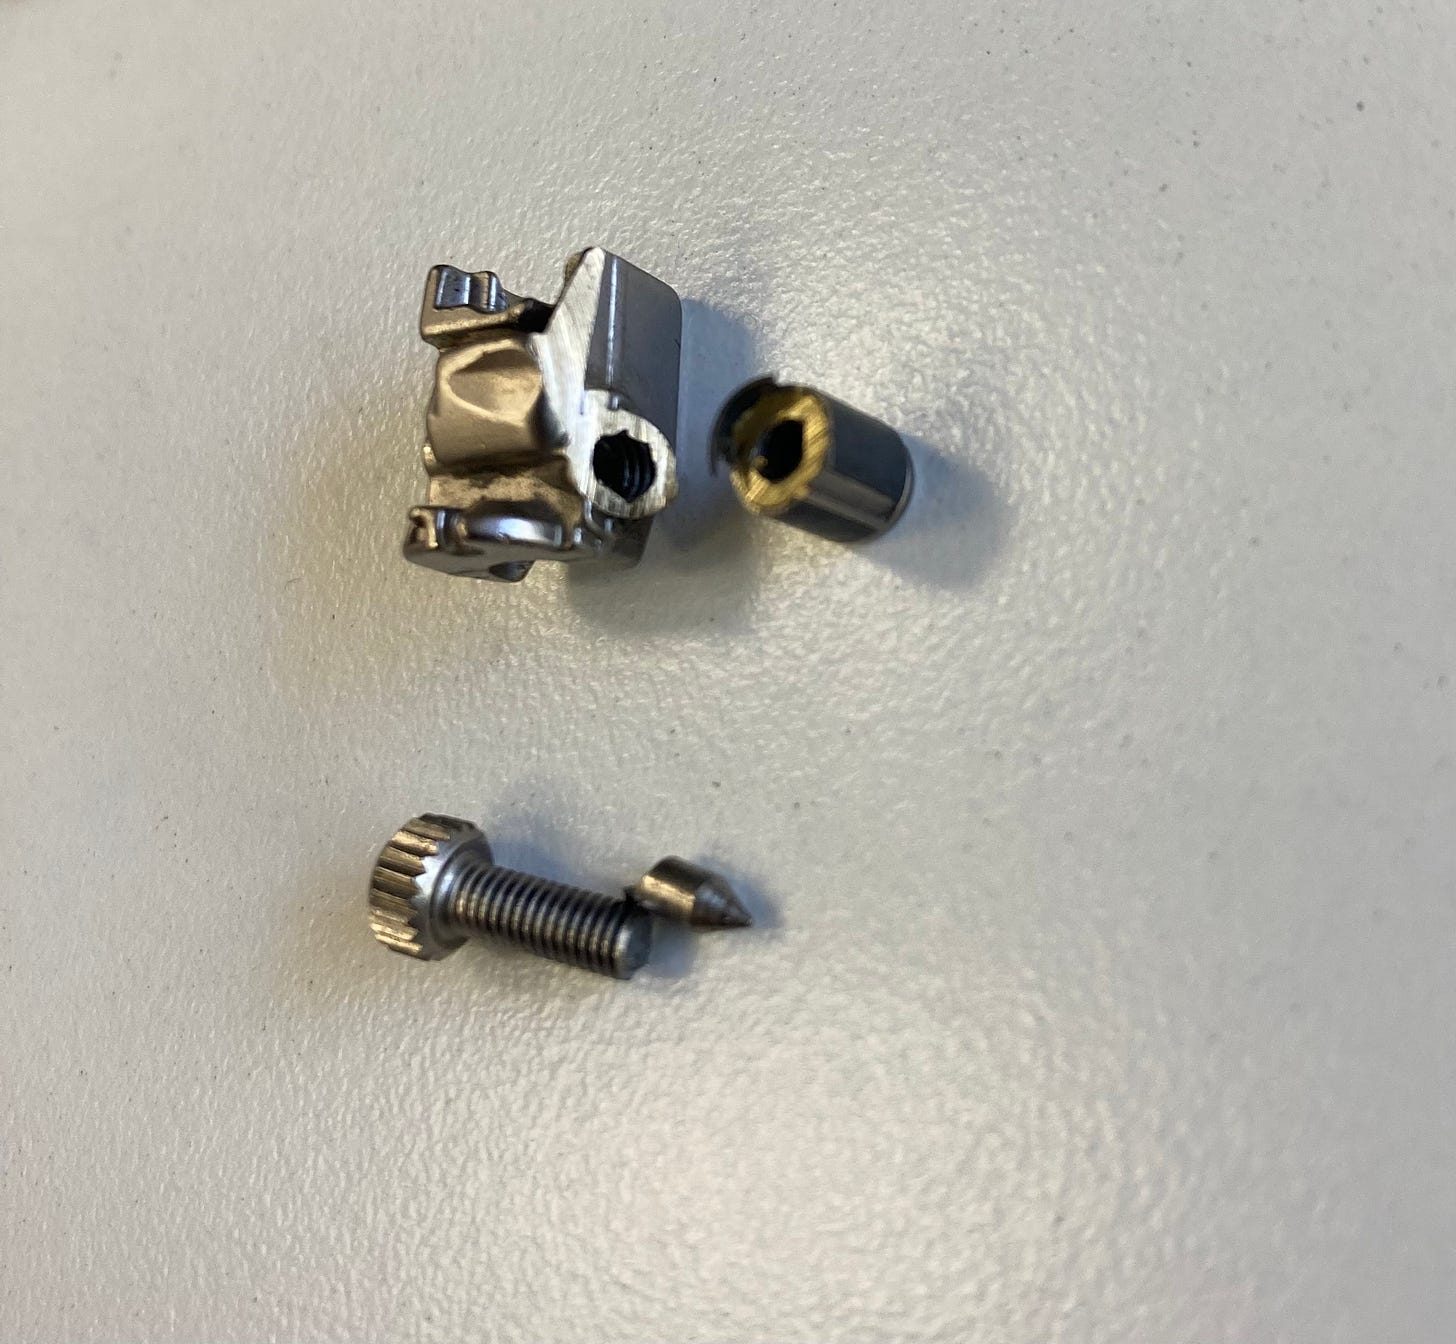
Take a look at this needle clamp and needle screw in the photo above. The screw was overtightened and the tip of the screw broke off inside the needle clamp. The screw tip got stuck inside the clamp, so one of our technicians had to saw off the needle clamp in order to remove the screw tip. Of course, after sawing the clamp in half, we had to replace the clamp as well as the screw.
The owner of this machine was actually lucky that the screw broke. We have seen overtightening where the screw doesn’t break and instead distorts the shape of the needle bar, which then must replaced. That is a massive, labor-intensive job for our repair department, and a costly mistake for the owner of the machine.
Thank you for reading. I hope you found this article helpful.
-Cale


So helpful… thank you… I really enjoy the science behind how the machine works 👍
Keep it up, Cale. You have kept me out of trouble with all of this great information. I always look forward to your articles. 👍