


Anatomy of a Sewing Machine
Knee Bone Connected to the Thigh Bone-- Sewing Machine Edition

Greetings everybody,
This edition of The Sewing Machine Newsletter takes inspiration from the children’s song, “Knee Bone Connects to the Thigh Bone," and offers a simple, big-picture explanation of how a sewing machine works. It’s not a comprehensive breakdown—modern machines are incredibly complex—but this overview should be both helpful and interesting for anyone who wants to better understand the basic anatomy of their sewing machine.
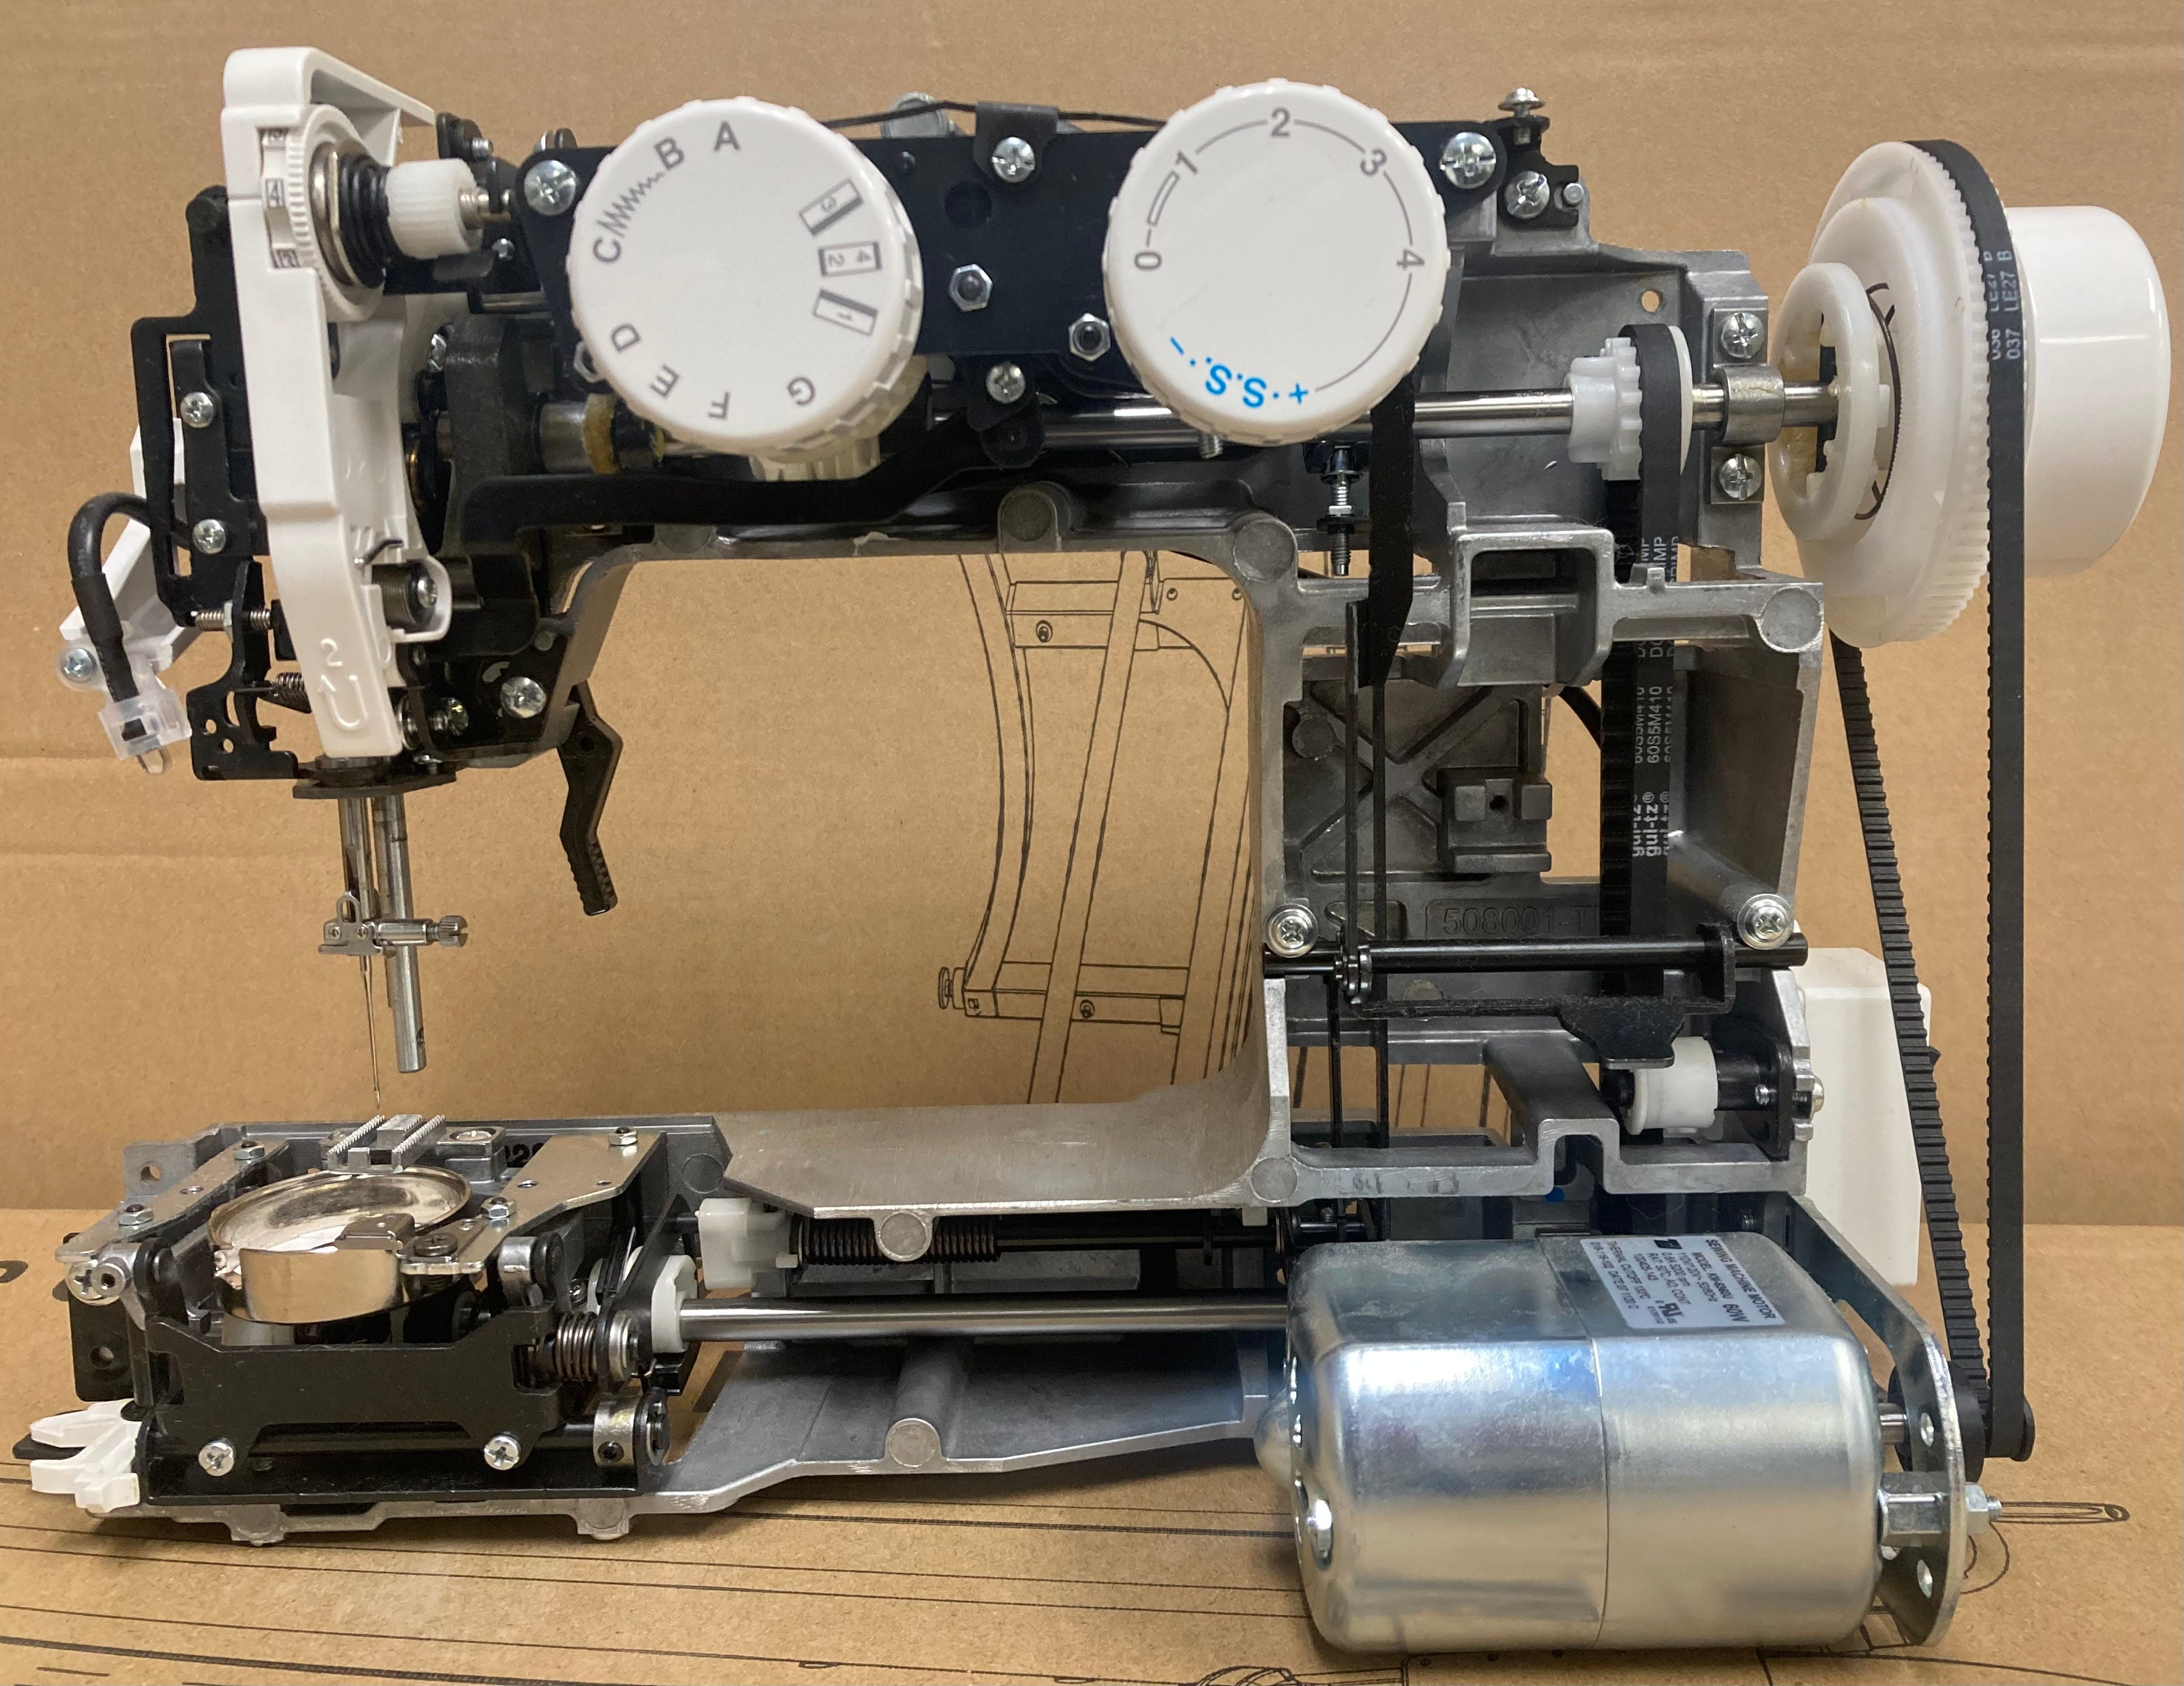
For the use of this article, I removed the plastic shell of an entry level $250 Janome mechanical machine (pictured above) in order to provide a clear visual of a sewing machine’s critical internal components. All photos you’ll see are of this particular Janome model, but the principles apply to all modern sewing machines.
Thank you for reading.
-Cale
How a Sewing Machine's Internal Components Connect to Each Other
The foot pedal connects to the motor.
The motor connects to the motor belt.
The motor belt connects to the handwheel.
The handwheel connects to the upper shaft.
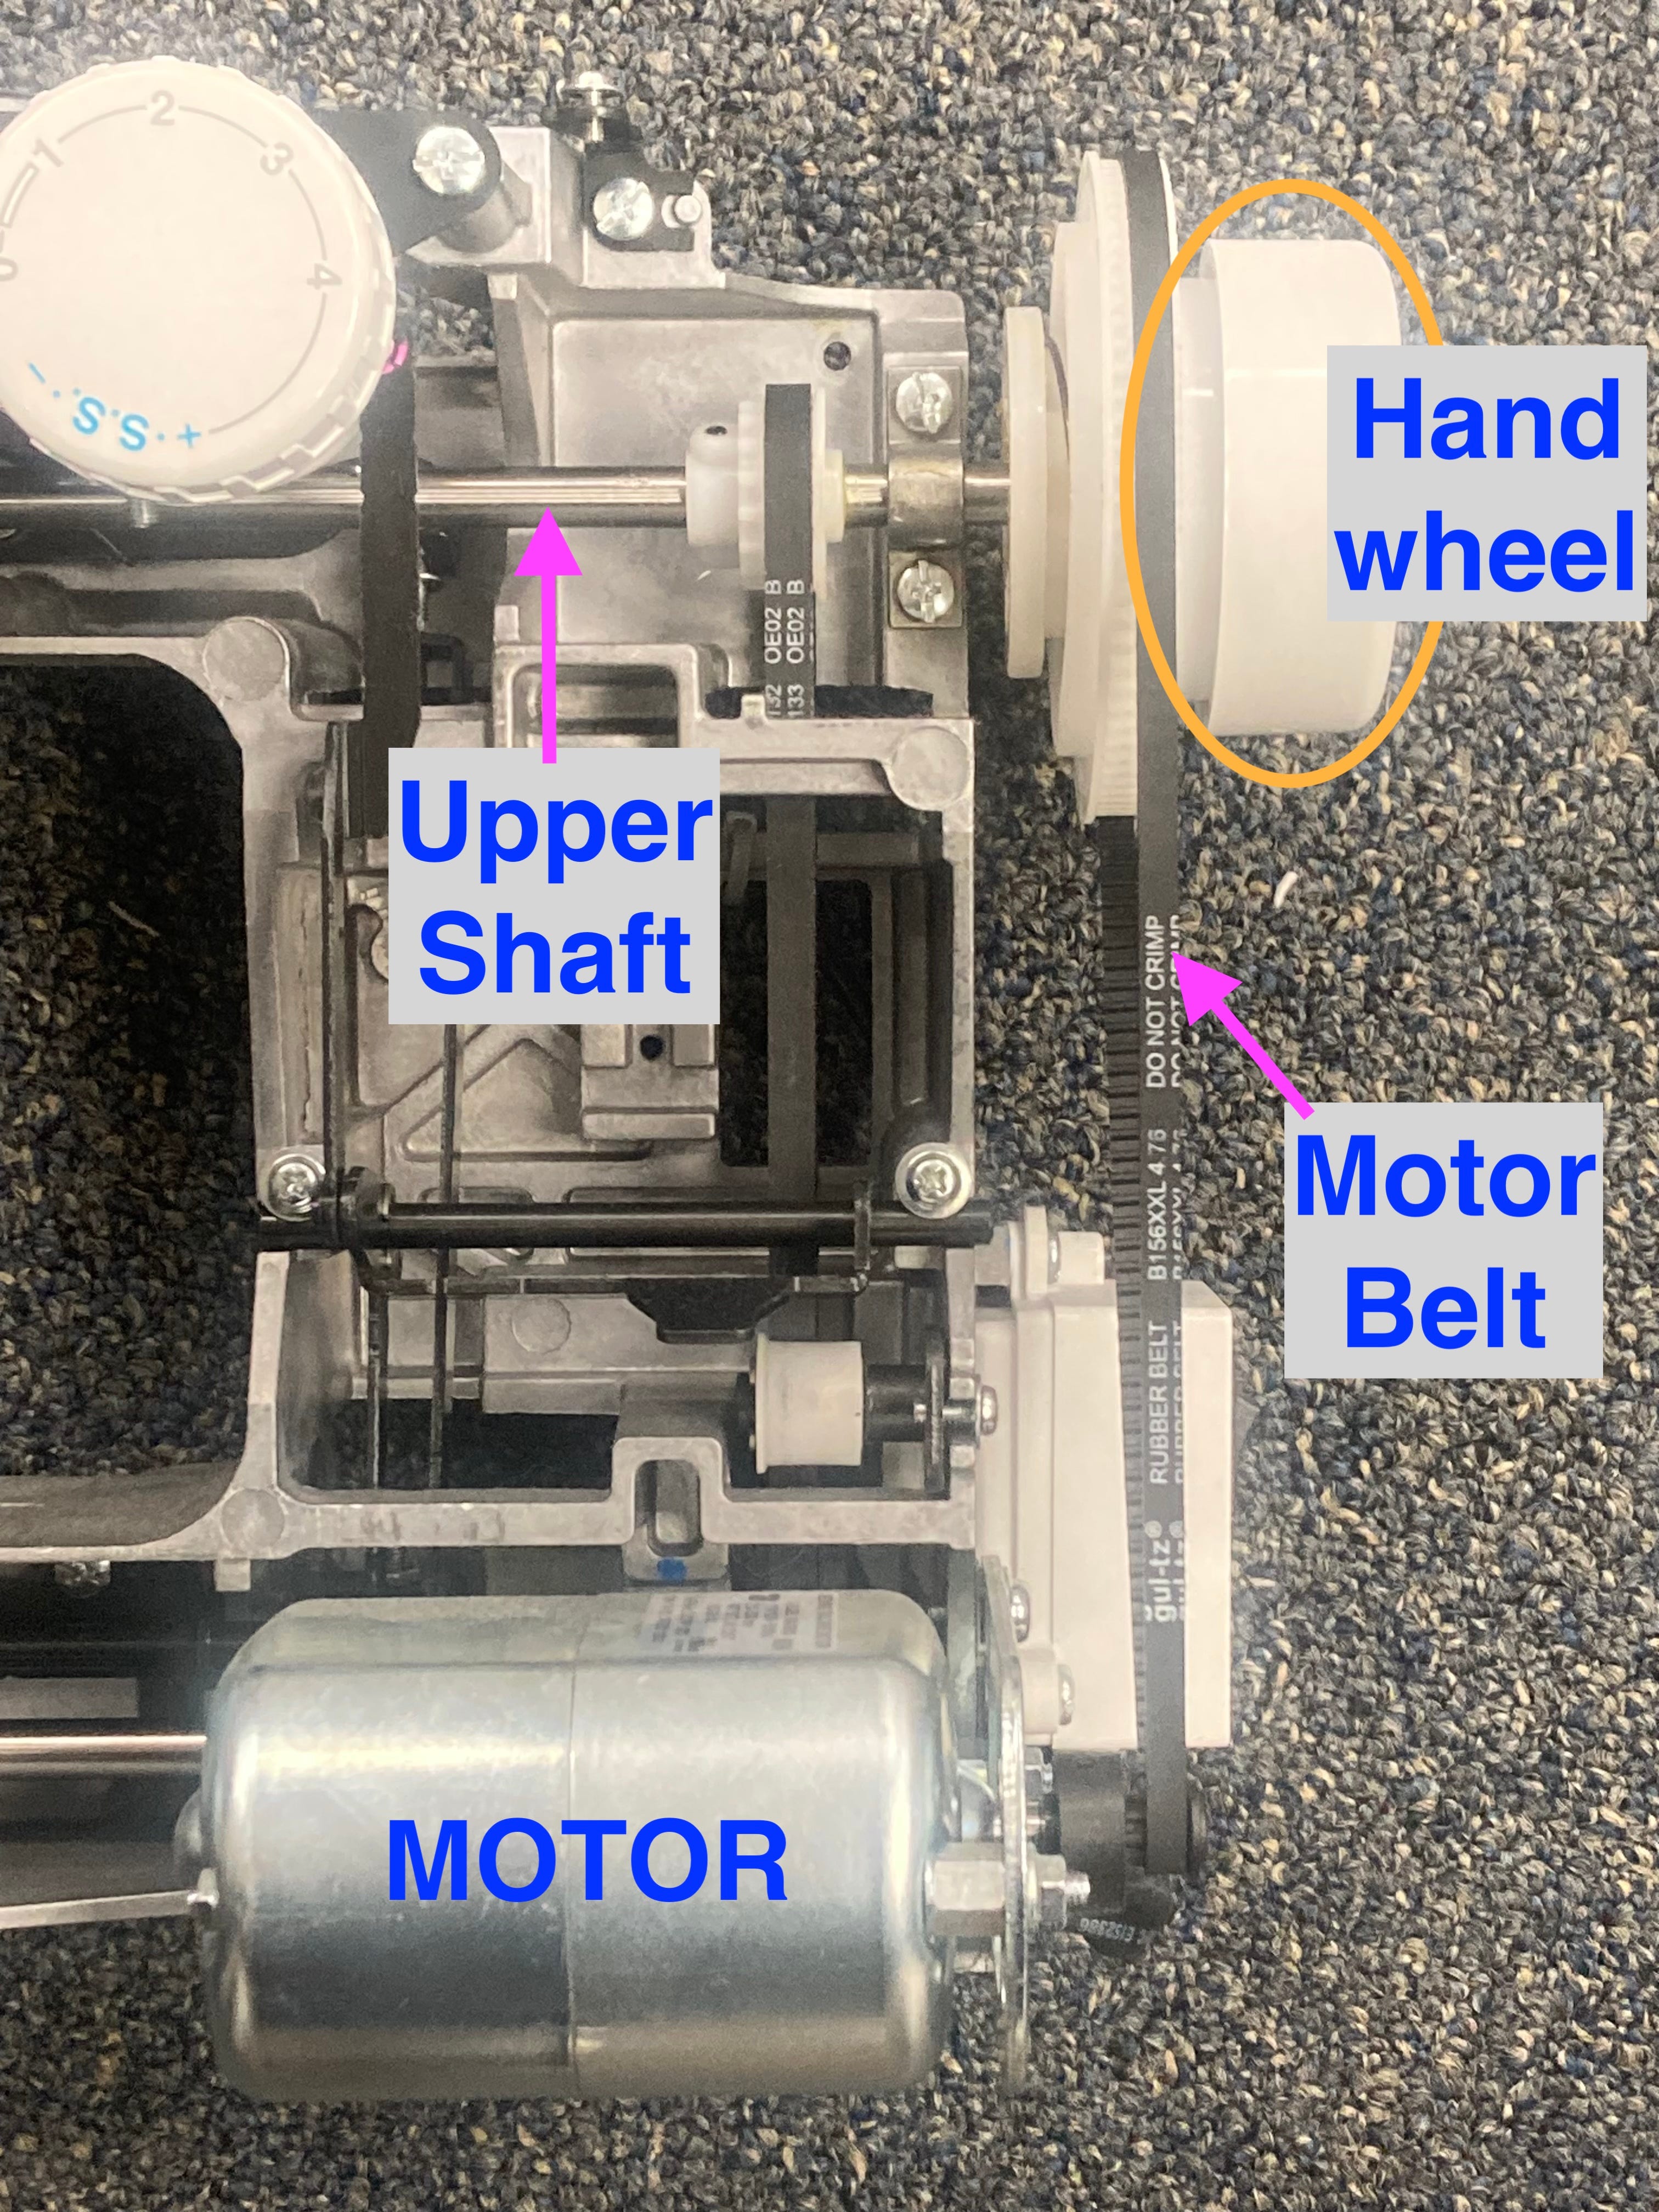
When the user presses down on the foot pedal, the motor turns over, which turns the motor belt, which turns the handwheel, which turns the machine’s upper shaft.
The upper shaft is connected to the take-up lever mechanism.
The take-up lever mechanism is connected to the needle bar.
The needle bar is connected to the needle.
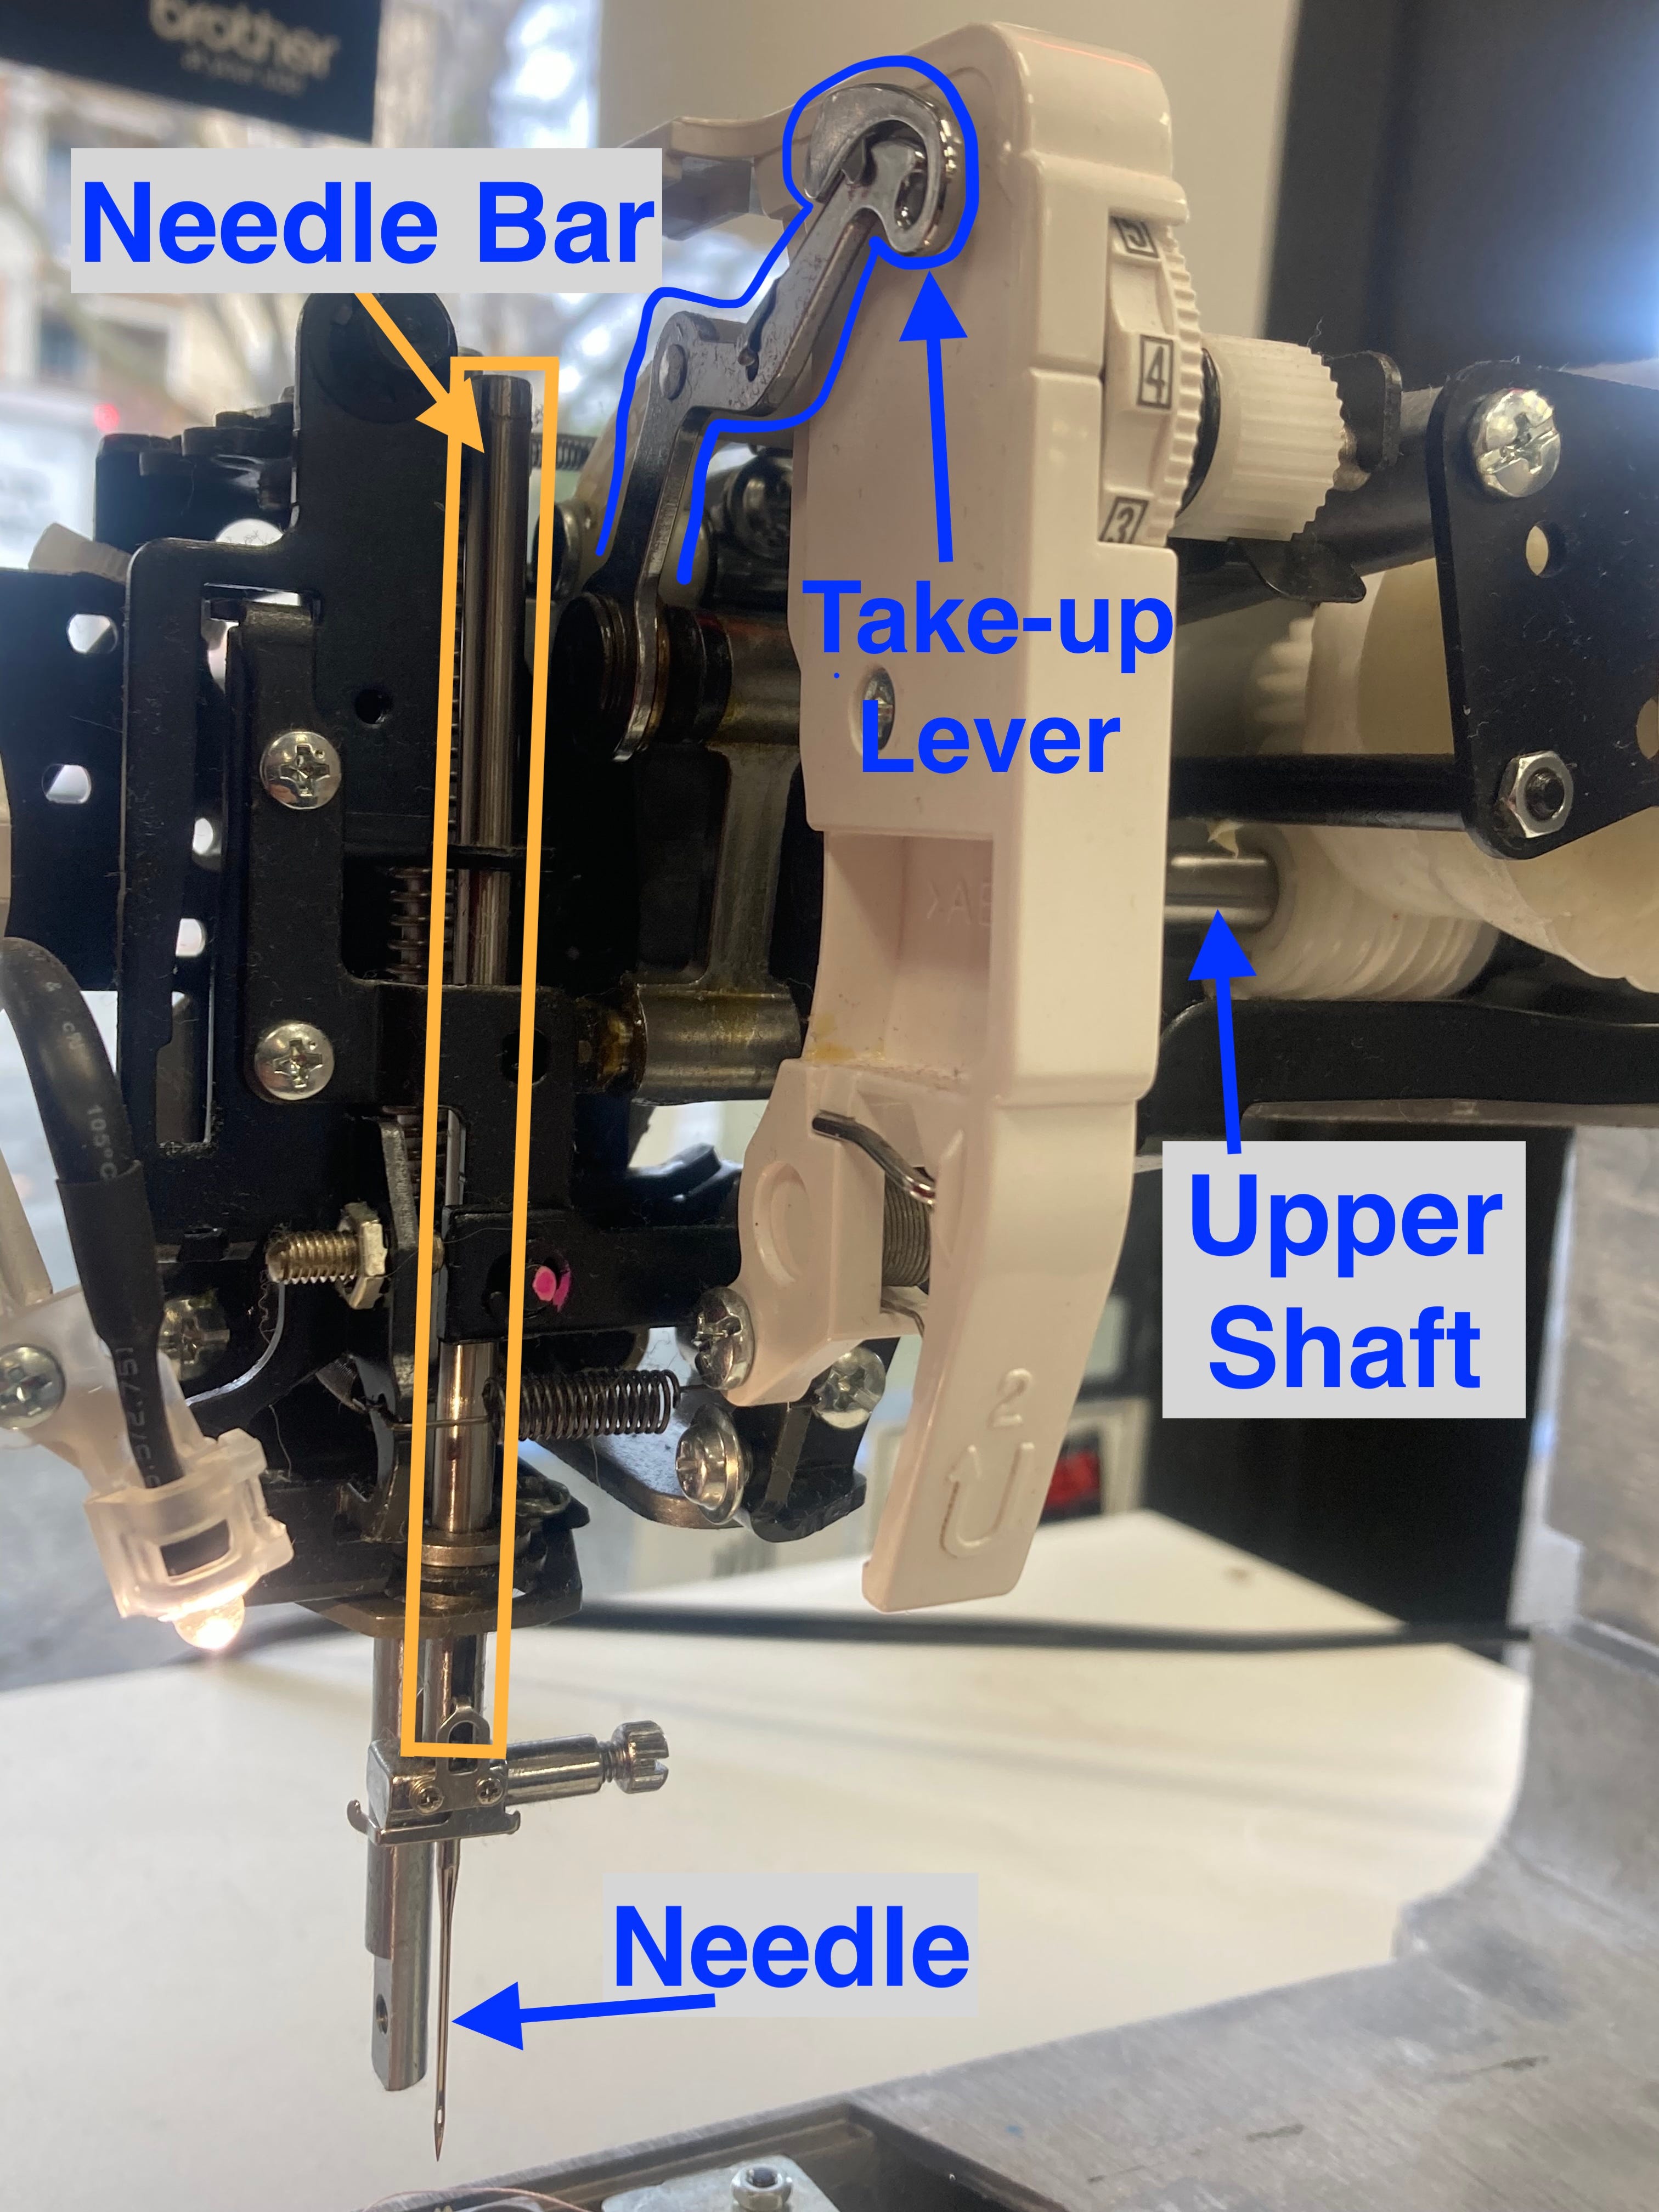
As the upper shaft turns, the take-up lever mechanism and needle bar move up and down, sending the needle down below the needle plate and back up again.
The action of the needle is a part of the process that helps form the knot down below the needle plate. Meanwhile, the action of the take-up lever moving upward helps cinch that knot up into the fabric.

The upper shaft is also connected to the timing belt.
The timing belt is connected to the lower shaft.
When the upper shaft turns, the timing belt turns, which causes the lower shaft to turn.

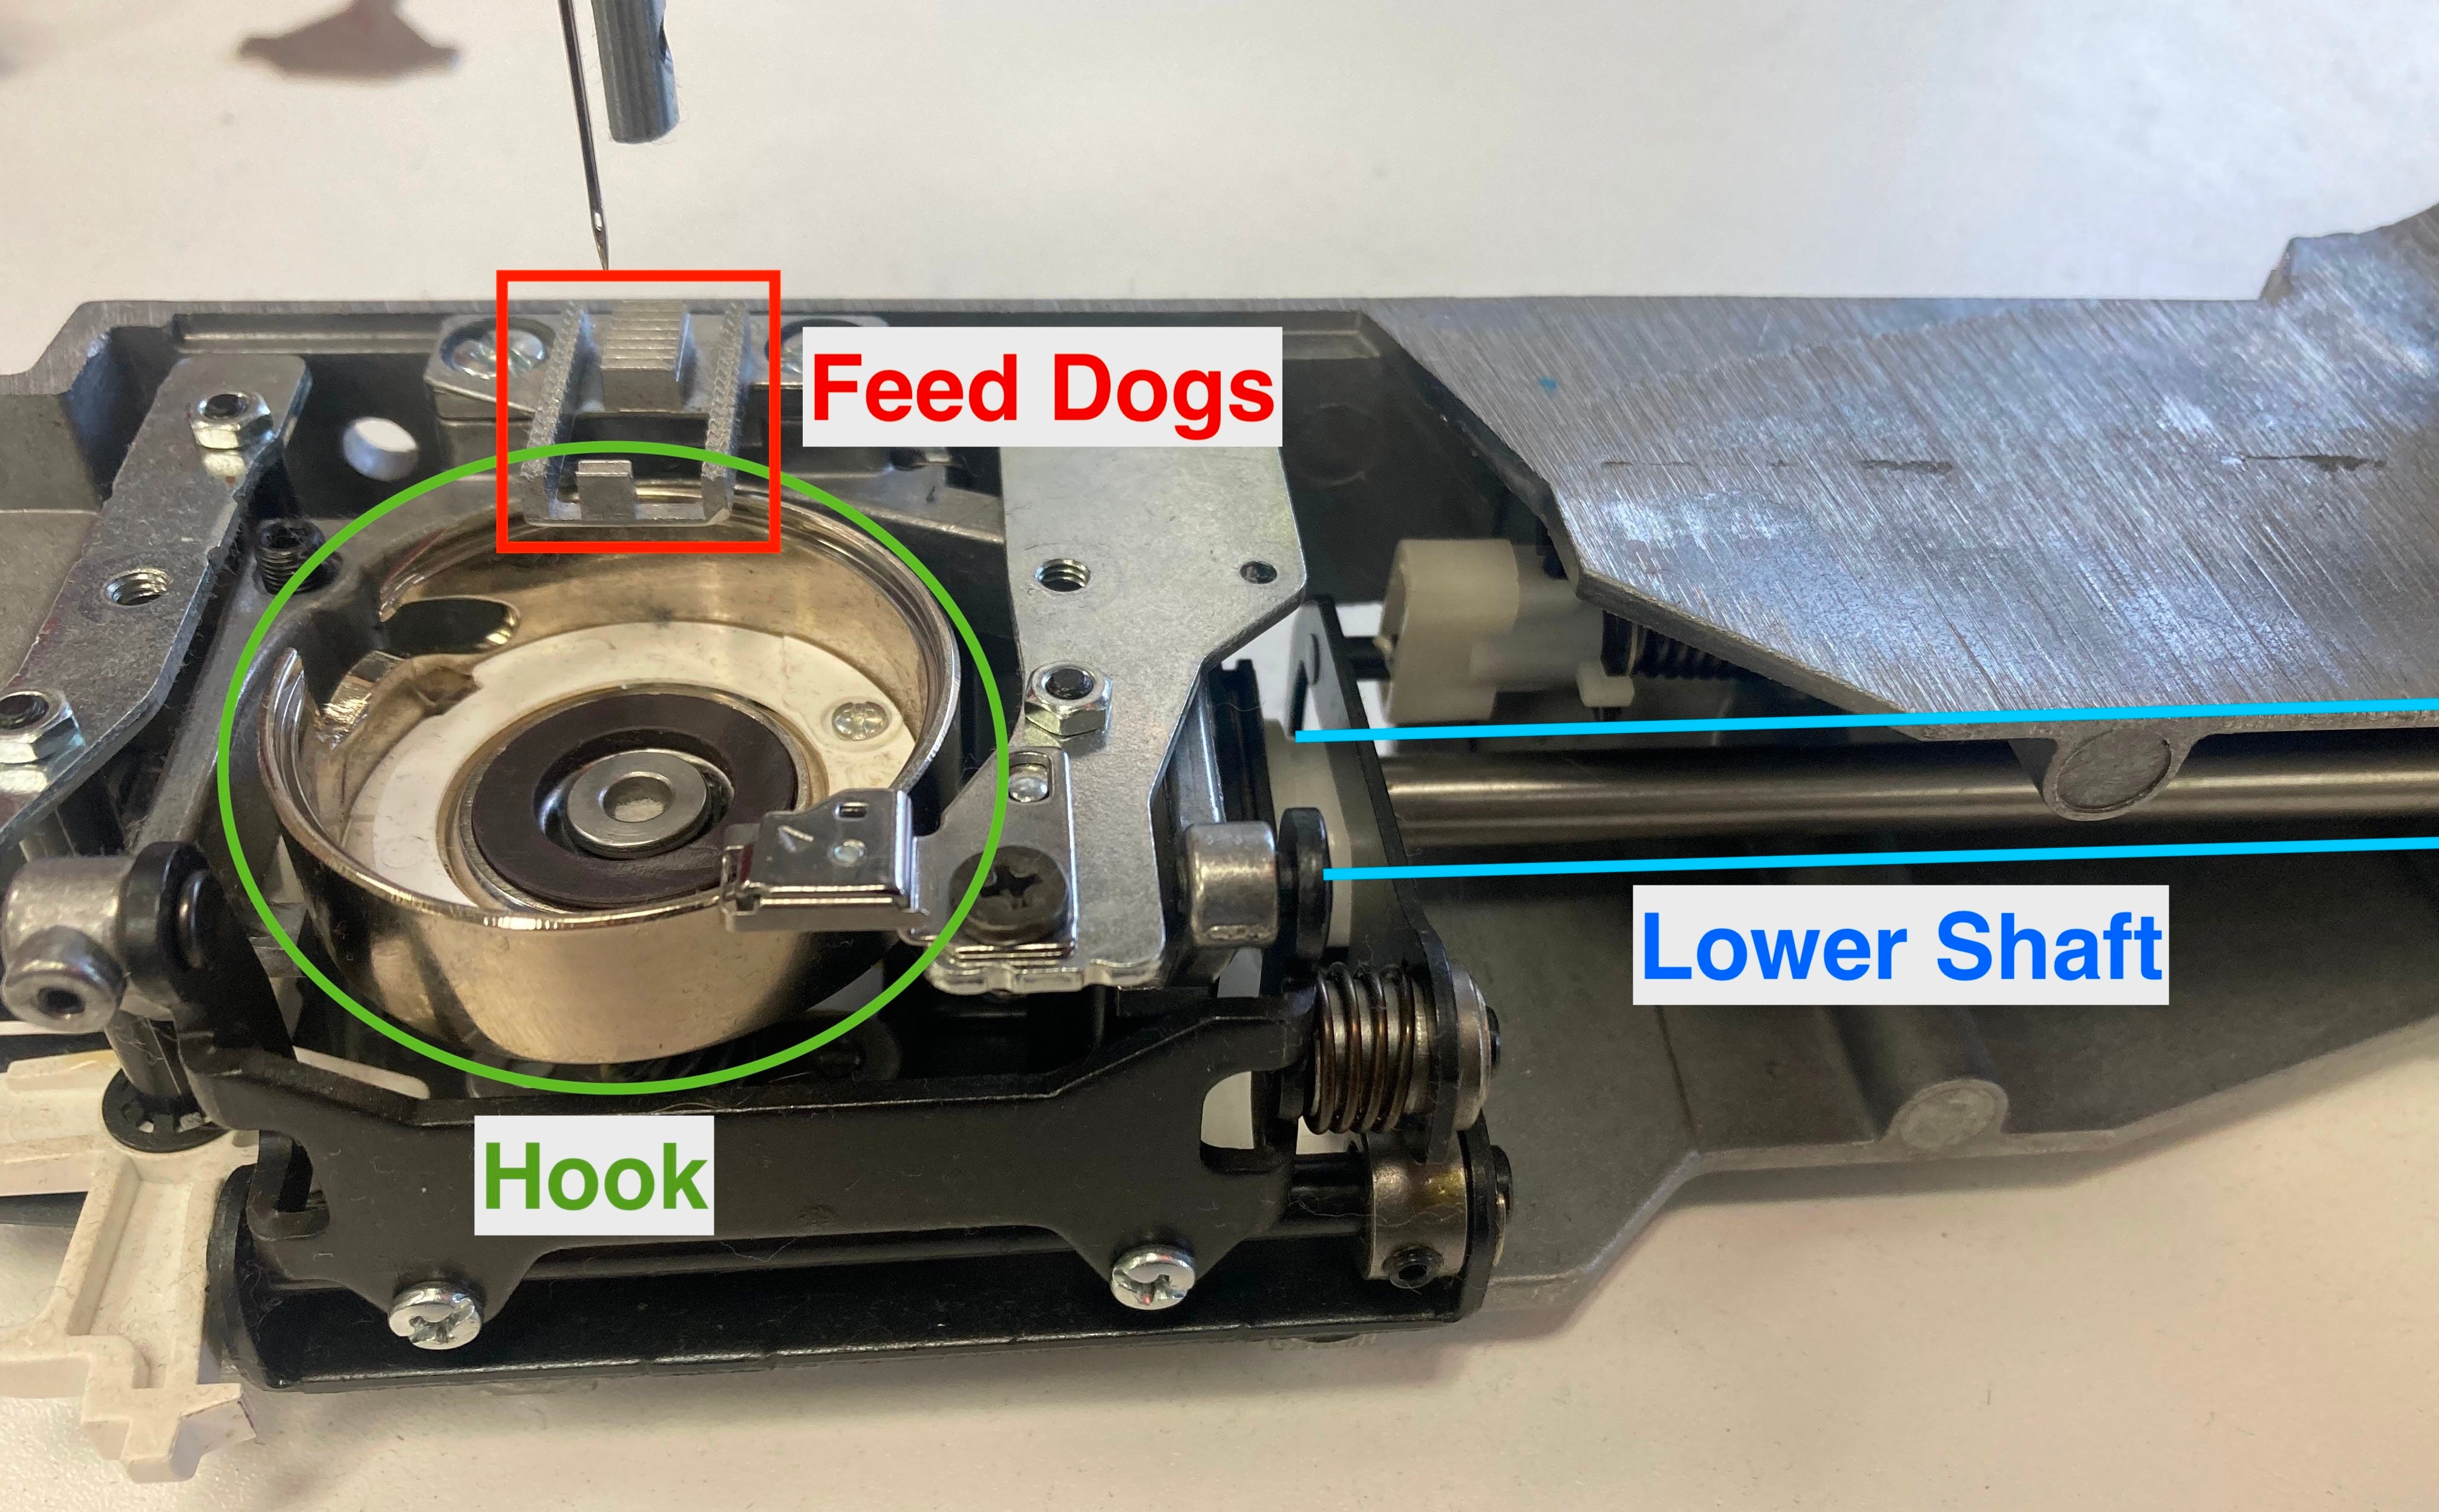
The lower shaft is connected to the hook.
The lower shaft is also connected to the feed dogs.
Both hook and feed dogs connect to the lower shaft, which connects to the timing belt, which connects to the upper shaft, which connects to the needle bar and needle.

Now, every part I just mentioned is connected to the machine’s metal housing. Think of the housing as a foundation for a home. No home is of high quality if it doesn't have a solid, well-built foundation, and the same principle applies to sewing machines.
On a quality-built sewing machine, all the critical components of the machine are attached to a one-piece all-metal housing: the needle bar assembly, hook assembly, feed dogs, upper shaft, lower shaft, etc. You can actually remove both the front plastic cover and back plastic cover completely and sew on the machine without them.


There are other key components I haven’t yet mentioned—like the presser foot bar and the upper tension mechanism—that also connect directly to the metal housing. A well-built machine links all of these critical components through a solid, stable metal foundation. That internal metal housing structure is what ensures precision, consistency, and long-term durability.


A common sentiment I hear from sewists of all backgrounds is disappointment over the use of plastic in modern sewing machines. While that concern isn’t unfounded, it’s also a bit misunderstood.
Yes, there are plenty of inexpensive machines built with plastic housing instead of metal housing that sacrifice durability. However, many high-quality modern machines feature a plastic outer shell for aesthetics or weight reduction, but underneath that shell is a solid metal frame. And when it comes to performance and longevity, it’s that internal metal housing that truly matters.

Below is a video I made that shows how all these parts on the machine work together to make a stitch:
Thank you for reading!
If you enjoyed this article, please share with your fellow sewists, drop a comment in the comment section, or explore our extensive archive of other sewing machine educational articles.
—Cale
As always a very interesting post. The information about plastic covers is very helpful. Thank you for sharing your experience.
Your posts are so interesting! Thank you! I have a 1980 something Viking Husqvarna 990 with the label “computer.” It was my mom’s, now mine. I don’t think I’ll ever need to replace it, unless the circuit board goes.