The Reason for Thread Nests on the Underside of Fabric
The Importance of Threading the Sewing Machine's Takeup Lever
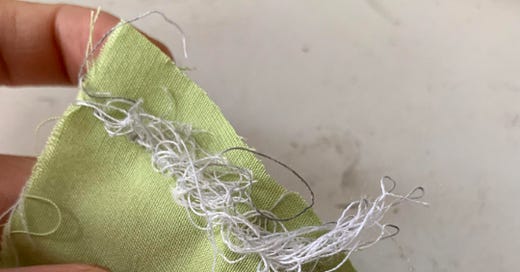
Whenever somebody brings their machine into our shop for a tuneup, we ask them if there are any specific complaints or problems regarding the machine’s performance. One of the most commonly cited issues is thread gathering on the underside of the fabric, also referred to as a “bird’s nest” or “thread nest.”
In this edition of The Sewing Machine Newsletter, we will examine the reason why thread nesting occurs, which hopefully helps us avoid the problem altogether in the future. I have talked about this subject before, but it is such a common problem that I think it is work re-framing in a manner that is more direct than I have done in the past.
99% of the Time. . . .
99% of the time thread nesting occurs, it is because the user failed to thread the takeup-lever properly. It’s a simple solution to the most common problem we see.


How common is it?
So common that when my father or I write up the notes on a repair ticket, we have pre-programmed note in our POS system so that we don’t have to type the same thing out every time we spot evidence of failure to properly thread the takeup lever.
Role of the Take-up Lever
Why does failure to thread the take-up lever properly result in thread nesting on the underside of the fabric? To answer this question, let’s take an in-depth look at the role of the take-up lever in the stitch-making process.
The function of a sewing machine is to stitch two or more pieces of fabric together. It accomplishes this by tying a knot between two sources of thread: the bobbin thread and the needle thread. This knot is formed below the needle plate, when the needle travels down through the needle plate hole.
As the needle journeys downward, the upper thread that you’ve threaded through the needle eye is taut. The needle thread remains taut until the needle reaches its bottommost position. Then, as the needle is just beginning to rise upwards out of its bottommost position, a thread loop forms at the eye of the needle. Just as the needle rises and this thread loop forms at the needle eye, the hook point of the sewing machine’s hook mechanism comes along and passes through the thread loop. The hook point catches the needle thread and takes said needle thread along a 360-degree path around the bobbin case. While riding along this path, the upper thread and bobbin thread form a loose knot.
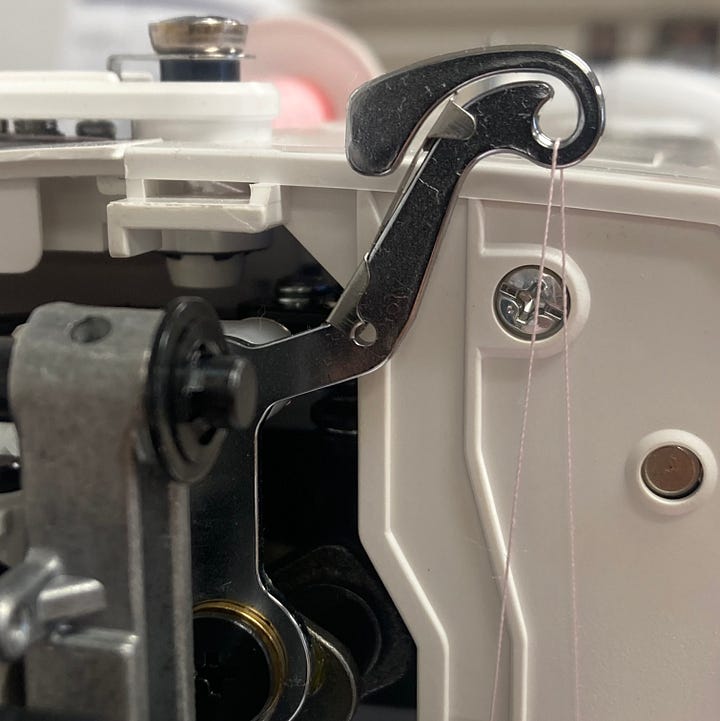
Meanwhile, as the hook completes its 360-degree revolution around the bobbin, the needle continues to travel upward. It rises above the needle plate and continues to rise until it reaches its highest position. As the needle reaches its high point, the take-up lever also reaches its highest point. The machine’s top thread source is threaded through the take-up lever eyelet, so, when the take-up lever rises to its highest position, the action of it rising causes the loose knot formed beneath the needle plate to be cinched upwards— up into the fabric we are sewing. If our tension is balanced properly, then that knot will be cinched up and hide in between the multiple layers of fabric we are sewing. That, in short, is how a successful stitch is made.
The video below shows a beautiful animation of the stitch-making process described above. Around the 40-second mark, the role of the take-up lever is shown clearly.
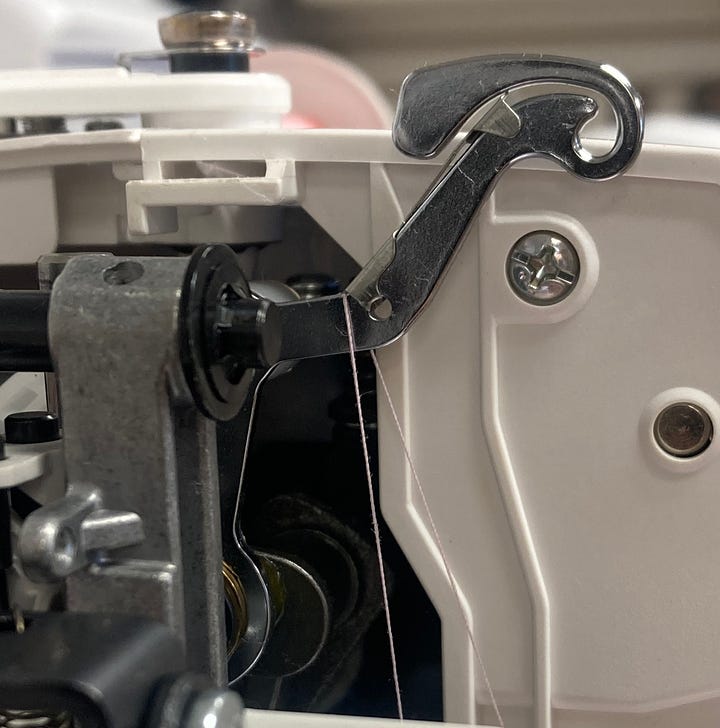
Imagine if the takeup lever is not threaded— that cinching action never happens, so the loose knot formed beneath the needle plate remains below the needle plate. Repeat that process for 5 seconds on a machine that sews 1,000 stitches per minute, and the result is a bunch of loose stitches underneath the fabric— AKA a bird nest.
Tips & Tricks
(1) Utilize your the machine’s needle Up/Down button
Before you thread the top half of the machine, use the needle up/down button to send the needle to its highest position. Doing this will simultaneously put the take-up lever in the ideal threading position.
(2) Floss your thread into the take-up lever
Many take-up levers are designed similar to a wasp trap— it’s sorta difficult to get the thread in, but once it’s in, it’s nearly impossible for it to get out. Flossing the thread into the take-up helps ensure that it gets into that eyelet properly. I’ll show this flossing technique in the video below.
(3) Visually Confirm
Always thread the machine with the presser foot in the raised position and visually confirm that the thread has slid into the take-up lever eyelet.
Conclusion
Thank you for reading.
Misthreading the take-up lever is one of the most common issues we see when troubleshooting sewing machines, so I hope you found this information helpful.
Note: This is not the same as small looping or “eyelashes”, which I covered a few months ago in an article called The Pull Test.
-Cale


Thank you so much for your helpful articles! It was most interesting to see that video showing the thread running across the surface of the bobbin case. And I'll be using the "needle up/down" button in a new way now!
I really enjoy your newsletters! I’ve learned so much! I’m very mechanical so follow to add to my experience!