Greetings everybody,
In this edition of The Sewing Machine Newsletter, I am going to talk about the “pull test,” a common cure for large looping on the underside of the fabric.
When my dad first taught me how to fix machines, I did not fully comprehend the importance of the pull test. Nowadays, I consider it to be an essential aspect of basic sewing machine troubleshooting. No matter what machine you own or what kind of sewing you do, please keep this nugget of information in your back pocket. You may not need it often, but I assure you that someday it will come in handy, especially if you sew a lot.
Cause of the Problem:
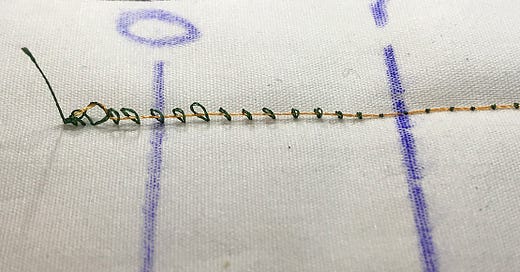
Large loops on the underside of the fabric is a very common issue for sewists of all types, no matter your machine, no matter the project.
Why does it happen?
Remember, a sewing machine makes a stitch using two sources of thread: the bobbin thread and the upper thread. A stitch is essentially a knot, and the knot is formed in the bobbin case area below the needle plate, when the needle does a dance with the hook mechanism. You can see how a stitch is formed in this incredible video below:
As you can see, the knot is initially formed down below the needle plate, but then the knot ends up sitting in-between the fabric. How does it get up there? There are two forces at play:
The first is the upstroke of your take-up lever.
The second is your top tension.
If your take-up lever is threaded properly and your upper tension dial is set at the correct value (between 3-6), but you are still getting loops on the underside of your fabric, then your machine most likely has zero-tension condition. Those loops you see are the top thread being pulled down to the bottom of the fabric. An entire seam can be sewn like this without you noticing, resulting in a long row of poor-quality stitches that must be pulled out.
Diagnosis and Fix:
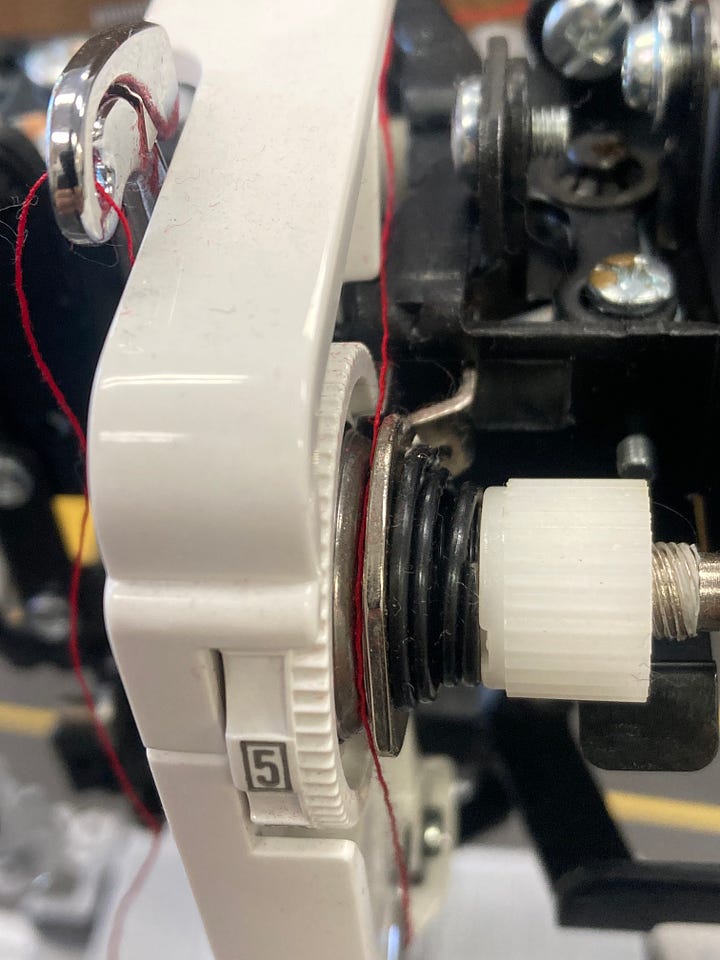
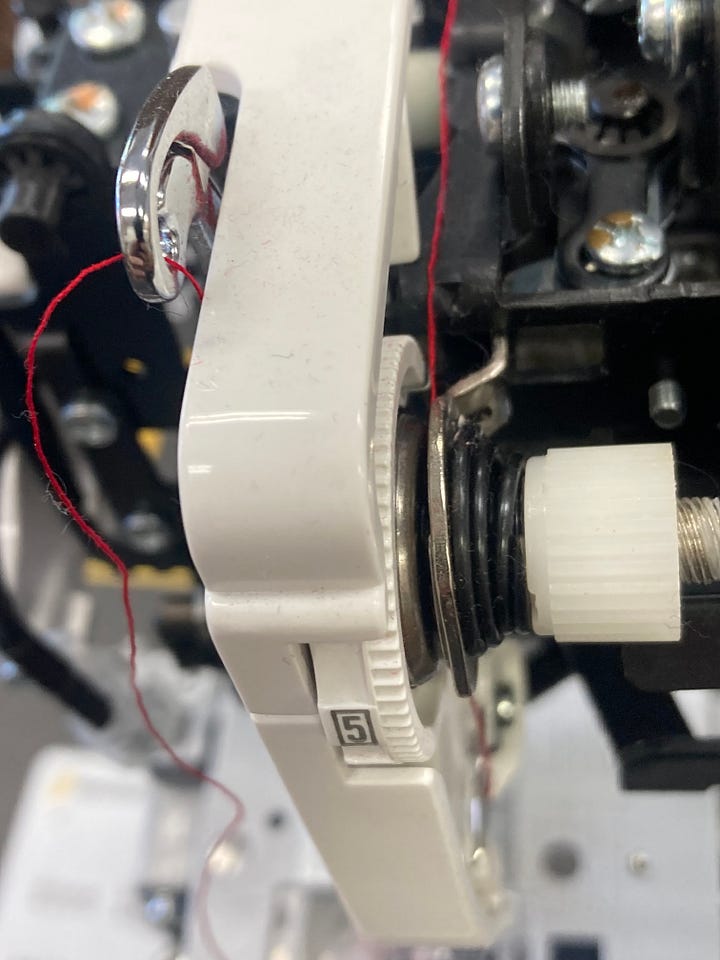
If you get these loops, the first step to fix the problem is to re-thread your machine. Make sure that when you re-thread your machine, you do so with the presser foot in the raised position. When the presser foot is raised, the upper tension discs release (they separate), which allows you to slide the thread between the discs. However, if you thread the machine with the presser foot in the down position, the tension discs are closed together. When the tension discs are closed and you try to thread the machine, the thread will not slide in between and instead sit atop the discs. This is guaranteed to create a zero tension and cause those nasty loops.


What if we thread the machine with the presser foot in the raised position and make sure to get the thread in between the tension discs, but we still get loops on the underside of the fabric? If this happens, we should do a simple test for zero-tension condition, something my dad has dubbed The Pull-Test.
The Pull Test:
Thread your machine correctly (don’t forget the take-up lever eyelet).
Do not thread the eye of the needle yet.
With the presser foot still raised, pull on your thread. You should feel very minimal or no resistance.
Lower the presser foot and pull the thread. You should feel a significant drag on the thread.
Now thread the needle and sew. Those loops should be gone and you are on your way.
If the upper thread still has no tension when you lower your foot and pull (step #4), and you have your dial at the correct value (between 3-6), then you have a problem. Oftentimes, there is shredded thread and/or lint in between your tension discs preventing them from closing. To try fixing this problem yourself, you ought to raise the presser foot (so that the tension discs separate) and blow canned air between the discs to blast out any compacted lint. If you see shredded or tangled thread caught between the tension discs, try to remove it with tweezers.
If there is no lint or thread between the tension discs and you still have zero-tension condition with the presser foot in the lowered position when performing the pull test, then it may be the case that your machine's tension release mechanism is malfunctioning. Fortunately, this is an easy repair for a trained technician.
I hope you found this article helpful and that you now have a better idea of how your upper tension system works.
Please feel free to share with your fellow sewists. Let me know what you think in the comment section.
Thank you for reading.
-Cale


OMG. I have needed this post for all of my life. Thank you for finally teaching me what the heck is wrong.
Good information for good sewing.