Threading the eye of a needle is a biblically difficult task. That’s why needle threaders are such a prominent selling point on modern machines. My favorite sewing machine manufacturers— Janome, Bernina, Baby Lock, Brother— all make machines with really nice needle threaders. Still, the saying that “it’s easier said than done” applies here. Needle threaders are the Achilles’ Heel for many sewists, and figuring out why they work sometimes and why they don’t work other times can be an infuriating mystery.
In this edition of The Sewing Machine Newsletter I will attempt to demystify the needle threader. I am going to explain exactly how needle threaders work and pinpoint a few intricacies that I’ve picked up on over the years. It is my firm belief that having a solid understanding of your needle threader mechanism will help you use your needle threader more successfully.
In principle, all needle threaders work the same way…
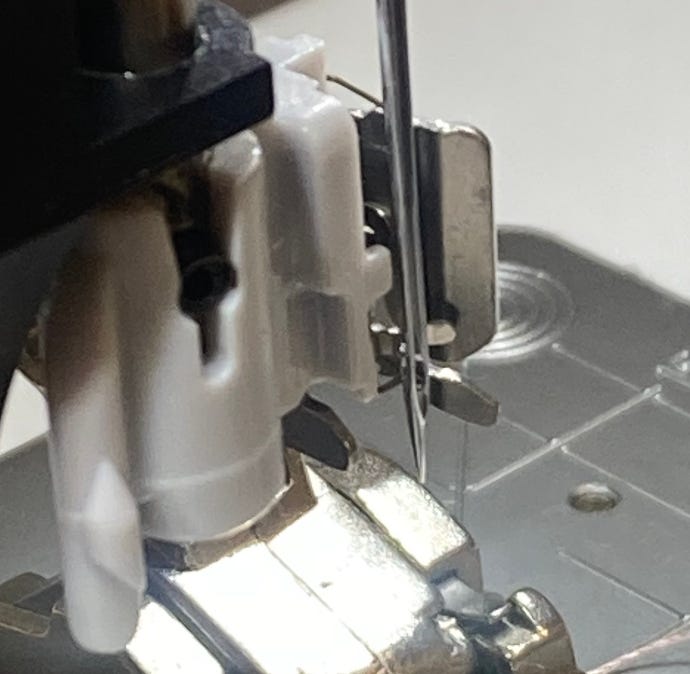
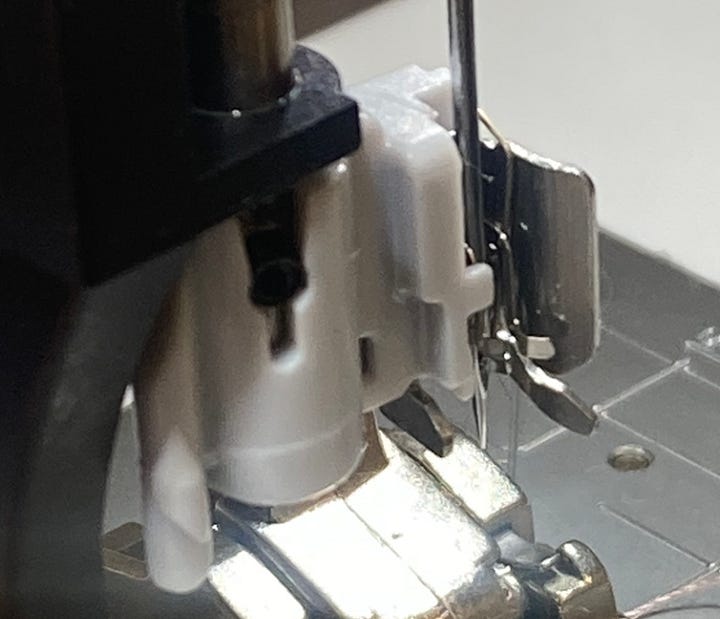
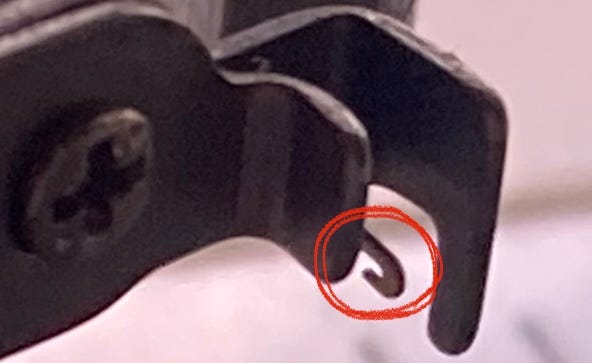
At the center of the needle threader mechanism, there is an extremely tiny hook-shaped wire that is critical to the success of your needle threader:
When you engage your needle threader, that tiny wire hook passes through the eye of the needle, from the back to the front.
The wire hook passes through the eye of the needle and sits there, waiting for you to give it some thread that it can pull through the needle eye.
Our job is to deliver the thread to that tiny wire hook. If we do our job properly, then that tiny wire hook will pull the thread through the eye of the needle when the needle threader is released.
Vocabulary Clarification: when we pull the needle threader lever down, I say the needle threader is engaged because the wire hook passes through the eye of the needle; when we let go of the lever, I say the needle threader is released because the wire hook pivots back out of the needle eye.
Given the minuscule size of the wire hook and the needle eye, there is not a lot of room for error. Over the years I have noticed a few common things that can go wrong when using the needle threader, and I am going to focus on those common issues now.
(1) Full Pivot
Notice in the videos above how the needle threader pivots back and forth, allowing the wire hook to pass in and out of the needle eye. Something I see often is that people do not pull the needle threader lever down all the way. They pull it down 95%, but the problem is that the wire hook does not pivot all the way through without that final 5%. In other words, the needle threader is not fully engaged, and it will not work if it’s not fully engaged.
On many of these needle threaders, the tricky thing is that it feels like you’ve pulled the lever down all the way. You feel like you’ve reached a natural stopping point and you don’t want to pull the lever down any further because you don’t want to break the machine. It’s understandable, but it’s something you need to push past in order to make your needle threader work. If the needle threader doesn’t achieve full pivot, then the wire hook does not fully pass through the eye of the needle, and your needle threader will not work.
(2) Hold The Thread Taut
If you watched the video earlier, then you heard me use the word “taut” 50 times in two minutes. I’ll reiterate it again because it’s super important: when doing the needle threader dance, hold the thread taut in your fingers. The needle threader dance requires a certain level of coordination. After all, we are handling super small objects (thread) and trying to fit them into really small places (needle eye). Precision is important, and holding the thread taut gives you the most amount of control and precision over the thread.
In other words: the thread will not go where you want it to go if you hold the thread lightly; there’s a better chance it will go where you want it to go if you hold it taut.
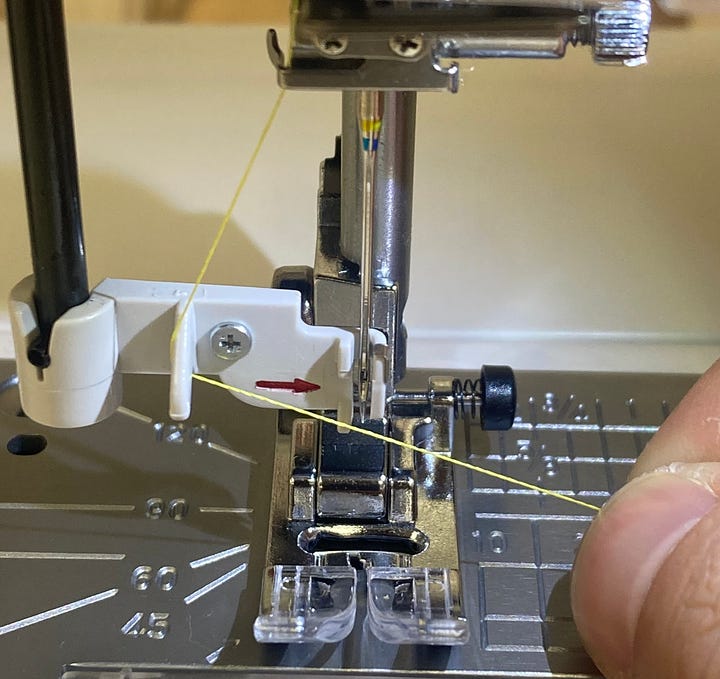
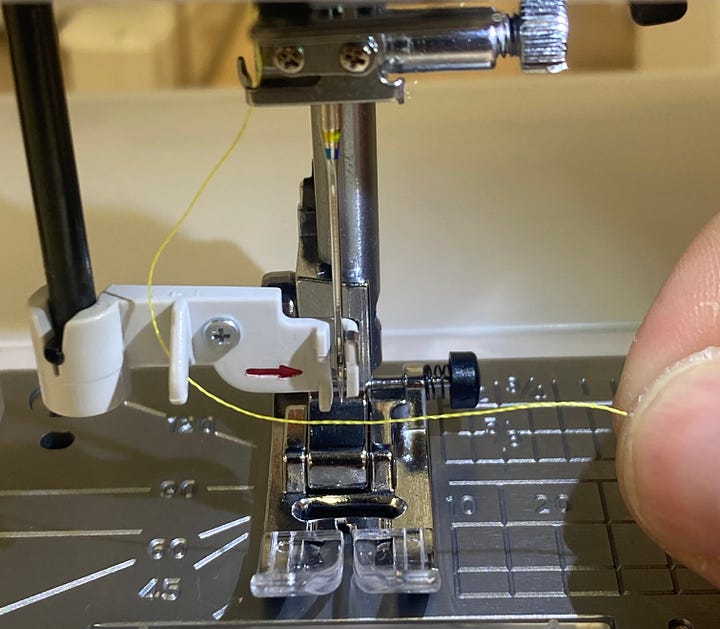
If you hold thread lightly in your fingers, you will have less control over the thread. It will bend and twirl and it will be more difficult to get it to go to the places you need (to that tiny wire hook). Again, I understand why you might feel the need to hold the thread lightly— that little wire hook is delicate, and perhaps you don’t want to break anything.
Don’t worry about that. Hold the thread taut.
If you hold the thread taut, then when you try to bring the thread to the bottom of the needle, it will go where you want it to go. If you hold the thread taut, then when you slide it up the front of the needle shaft into the tiny wire hook, the thread will go where you want to go. If you hold it lightly, it may twirl behind the needle or find its way to the topside of the wire hook, neither of which are a recipe for needle threader success.
(3) “Baby, you gotta let me go.”
If thread could talk, this is what it would say to you right as you release your needle threader lever.
Something I see often is a person who says they can’t get their needle threader to work, but then I watch them try to do it and they do everything perfectly. They follow the needle threader steps to tee, they hold the thread taut, but when the moment of truth arrives and they release the needle threader lever, they don’t let go of the thread in their fingers. They continue to hold onto it firmly, and this is a problem. The tiny wire hook pulls the thread through the needle eye, but the user never lets go of the thread and essentially un-threads the threaded needle. It’s Sisyphean.
To avoid this issue, remember the following: as you release the needle threader lever with one hand, let go of the thread you’re holding in the other hand. You can see a clear example of this in the video below:
Note: For some reason I see this most often on Bernina needle threaders.
One Last Thing…
Now, some of you don’t have a needle threader like the ones I have shown so far. You have a nicer needle threader that is more automatic, probably on your Janome or Brother or Baby Lock. Your needle threader looks a little bit different, and it should be easier to operate, but the same principles I’ve stressed so far still apply.
When you slide your thread into the various guides (especially that last couple thread guides), it is important that the thread is taut. If you slide your thread into the guides and the thread is loose, your needle threader will fail.
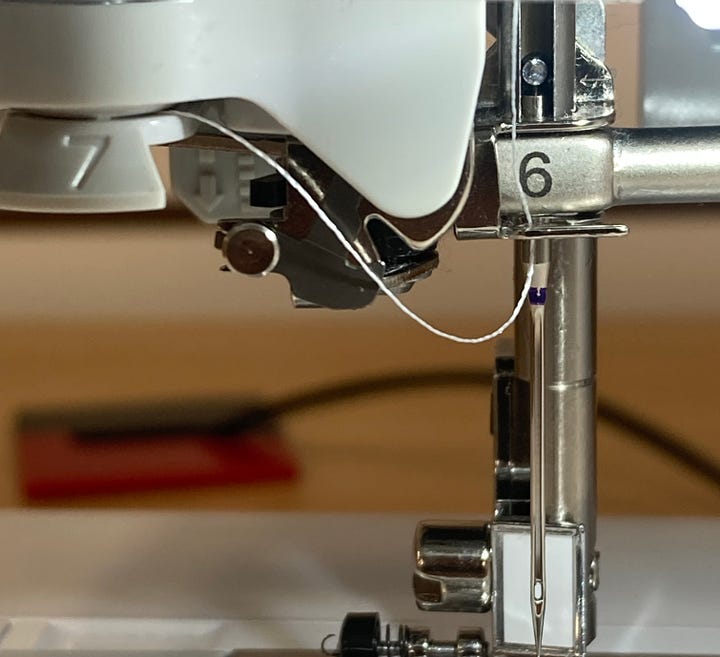
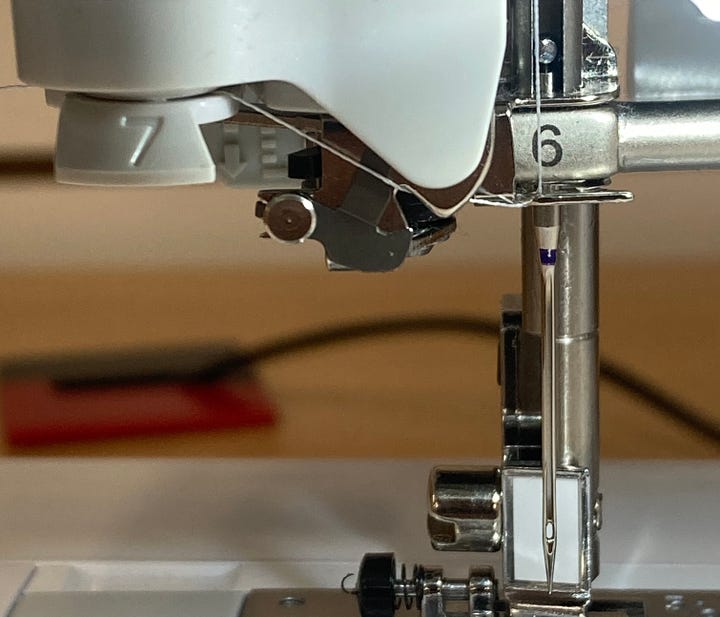
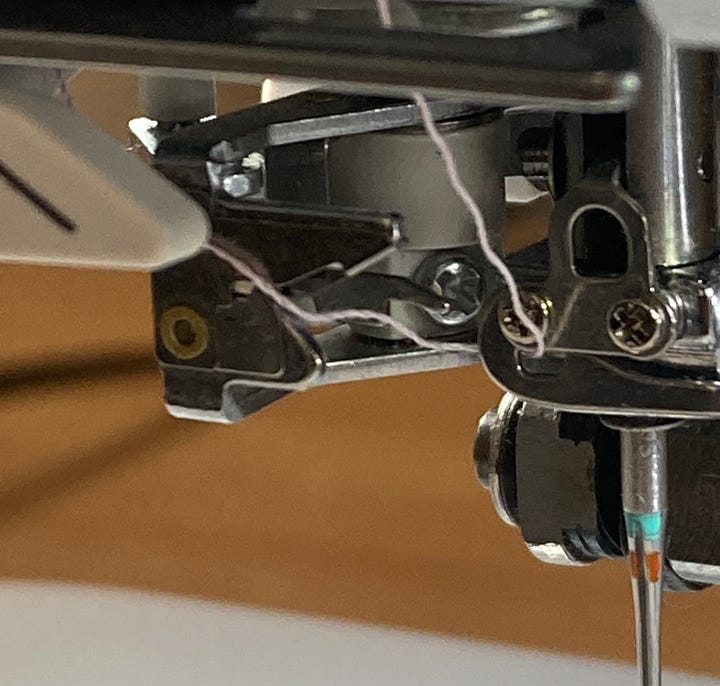
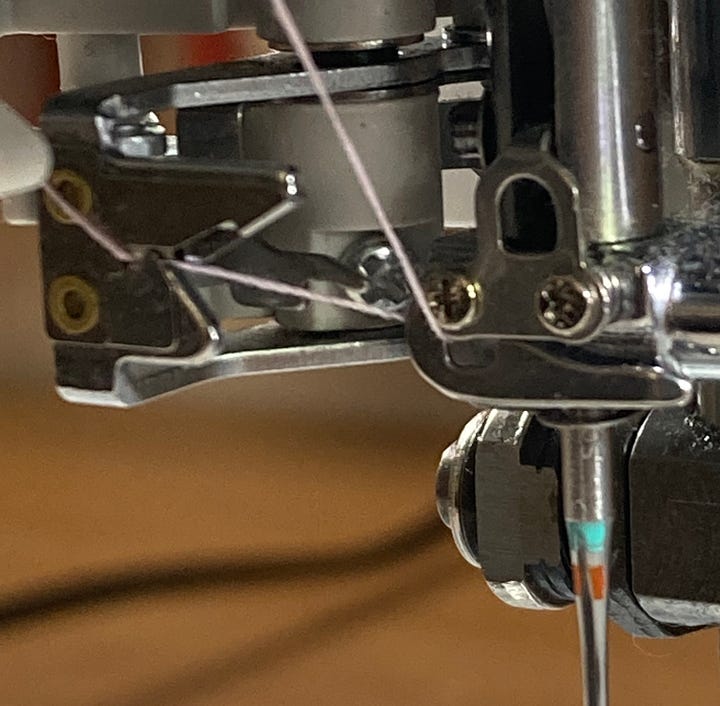
You still need pull the needle threader lever down all the way. If you don’t pull the lever down all the way, then the tiny wire hook won’t fully pass through the needle eye, and the needle threader will fail.
In Conclusion…
Needle threader frustration is one of the most common issues we see among sewists, so I hope you found this information helpful.
The funny thing is, I feel like this article was a comprehensive deep-dive examination of needle threaders— and I still feel that way— but I realize I didn’t even touch on a really common needle threader issue, which is the tiny wire hook getting bent out of shape. It’s not an exaggeration to say that our technicians probably replace 2-3 of those tiny wire hooks every day. Thus, this is only Part 1 of our needle threader examination. Stay tuned for an upcoming Part 2, in which we will talk about what causes that tiny wire hook to get bent, as well as all the preventative measures we can take. I will also show you how to make the same clever tool our technicians use to un-bend that tiny wire hook when it gets bent. It might save you a trip to the shop.
Let me know what you think in the comment section. Any and all feedback is greatly appreciated.
-Cale



I've had a needle threader for years, and it's always been hit or miss. After watching your Bernina video, I got mine to work! Thanks!
Thank you for writing this! Maybe I’ll try the needle threader on my Janome again using your tips. I’m on my second machine now and just assume it won’t work so I don’t even try.