The Key to Winding a Good Bobbin
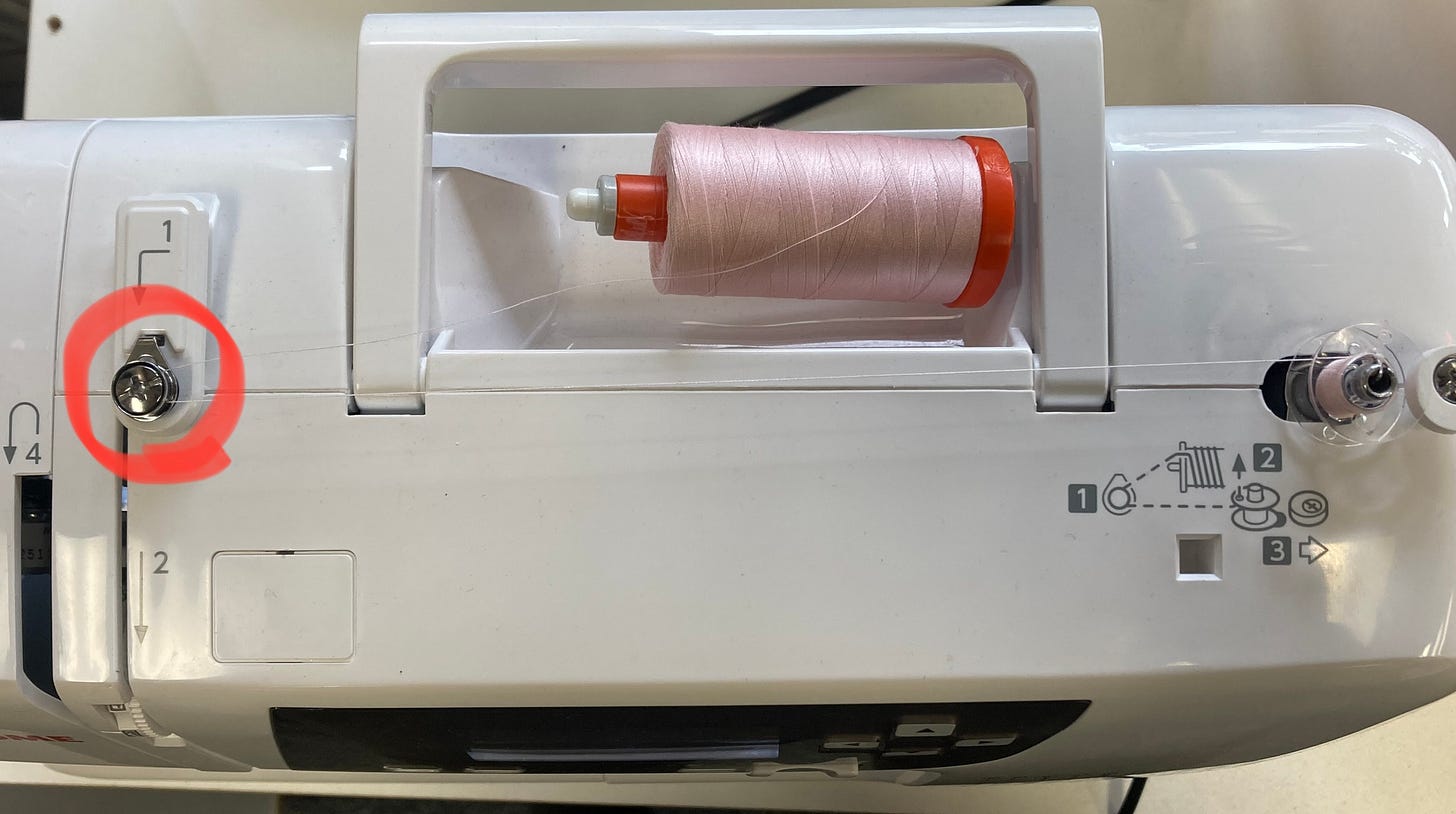
How to properly situate thread between the bobbin winder tensioner discs & why it is important
The key to winding a good bobbin is simple: the thread must be under adequate tension.
If the thread we use to wind the bobbin is not under proper tension, the bobbin will end up being “loose” or “sloppy”. This is no good. A sloppy bobbin will cause all sorts of problems, particularly with stitch quality, but also has the potential to cause more traumatic events such as thread jams and needle crashes.
In this edition of The Sewing Machine Newsletter, I will hone in on the key to winding a tight and even bobbin, plus certain techniques you can use to consistently achieve good bobbin winding. In addition, I will go into further detail about why winding a good bobbin is important, as I’ve realized many of our readers have a thirst for “the why” and not just “the how.”
The Bobbin Winder Tensioner Discs
Have you ever seen a young child tie their shoes? Typically they can form the knot with the shoelaces, but they don’t yet have the ability to keep the laces under tension while tying the knot. Their knot ends up being loose and will not hold. More likely than not, an adult will have to cinch the knot for them so the shoes stay on their feet.
The same principle applies to all the different tension apparatuses on your sewing machine. Generally speaking, on home sewing machines, there are three in total. The ones we think about most often are the upper thread tension discs and bobbin case tension discs. However, it is the third set of tension discs that I am concerned about for the purpose of the topic today: the bobbin winder tensioner discs.

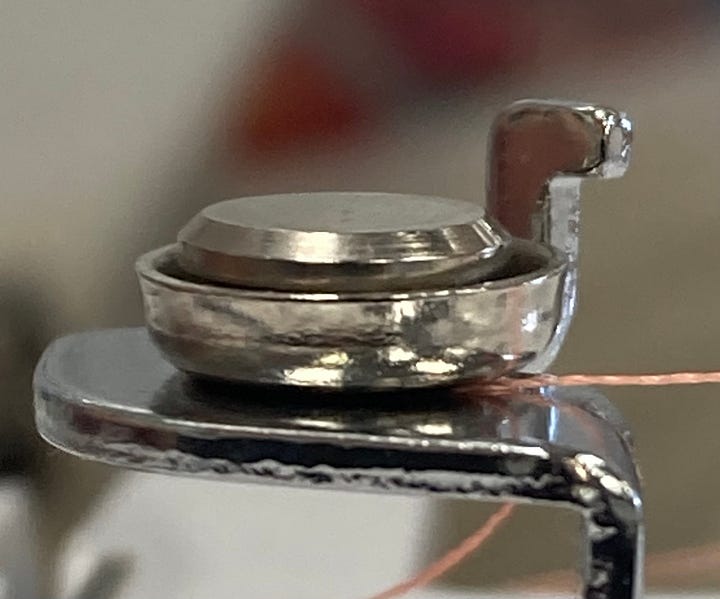
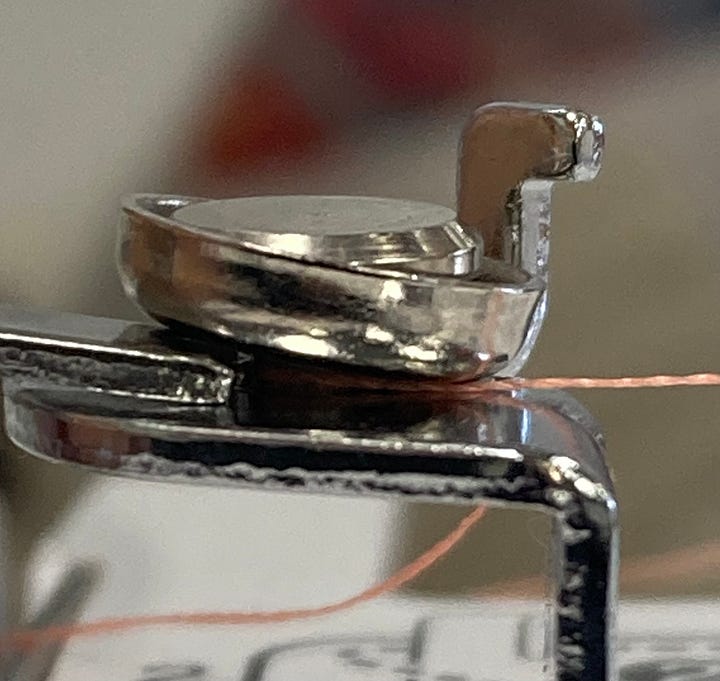
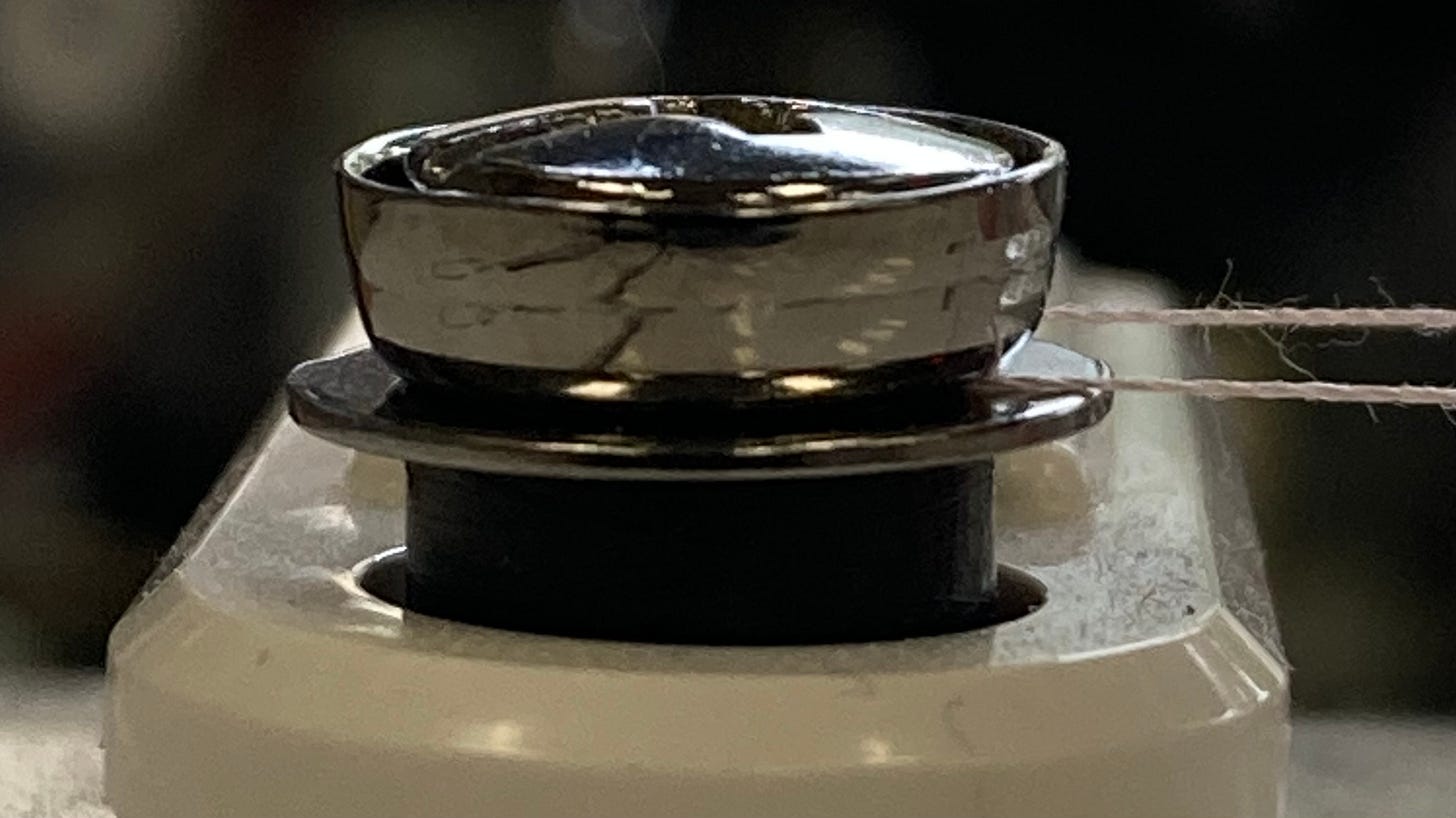
This piece right here — the bobbin winder tensioner discs — this is where the battle is won or lost. The thread you use to wind the bobbin must be sandwiched between the tensioner discs before going on to wind the bobbin itself.


If the thread is not properly situated between these tension discs, then your thread will not be under tension as you wind the bobbin. This is no good. Without proper tension on the thread, your bobbin is doomed to be loose and uneven— AKA a sloppy bobbin— which is not conducive to good stitch quality.
Therefore, achieving adequate tension is absolutely crucial to successfully wind a bobbin that is tight and even.
How to Ensure Proper Bobbin Winding Tension
There are two techniques I suggest you try if you find yourself winding loose, uneven bobbins.
(1) Floss the Thread
When bringing the thread around the bobbin winder tensioner, you will be holding the thread in one hand. Once the thread is around the tensioner, take your free hand and grab the other end of the thread coming off the spool. Floss the thread back and forth into the tensioner, just as you would floss your teeth. This action should situate the thread firmly between the tensioner discs.
To test, simply pull on the thread. Do you feel some tension when you pull? If yes, then you have already won the battle and can move on to the next step, which is winding the bobbin itself. If you don’t feel tension when you pull, then you should not move on to the next step. Try flossing the thread again. If you’re still not getting tension after flossing, then try the second technique I explain below…
(2) 360 Degrees
In your machine’s instruction manual, there is a diagram of how the thread should go around the bobbin winder tensioner discs. Typically the manual won’t show the thread winding around the tensioner a full 360 degrees, but this is the action I recommend if you aren’t getting proper tension even after flossing the thread. Watch the video below to get a better idea of what I mean:
Why is it bad to get a sloppy bobbin?
In the recent newsletter about spool caps, I spoke about the importance of an unobstructed upper thread path. The same principle applies to the bobbin thread path— an obstruction in the bobbin thread path can cause stitch quality issues, thread breakage, and increase the potential for traumatic events to occur.
Think about it like this:
You want the thread to flow freely from the bobbin. There is a portion of the bobbin thread that is “next up” in the sense that it is the next portion of the bobbin thread that will be used to make a stitch. When you wind a good bobbin where the thread is tight and even, the portion of the bobbin thread that is “next up” should flow freely from the bobbin as it partakes in the stitch-making process. However, if you wind a loose sloppy bobbin (as seen in the photo above), the thread that is “next up” may be buried underneath other loose threads due to the bobbin being wound sloppy. Therefore, the thread that is “next up” has to pass through the thread it is buried under, which essentially acts as an obstruction in the bobbin thread path. The thread that is “next up” can get knotted and tangled on the thread it is buried under, and this can cause problems. For example, a tangle in this area could cause the bobbin to hop out of its proper place in the bobbin case and snag, which can screw up the machine’s stitch quality (e.g. bouts of looping on the underside of the fabric). It can even cause the bobbin case to hop out of its proper position in the bobbin case basket and create the potential for a needle crash (read Avoiding Traumatic Events #1 for more).
Before close, I should mention here that you should not wind multiple sources of threads onto a single bobbin. This can cause the same problems I just mentioned— tangles & snags, poor stitch quality, etc.
Thank you for reading. Slowly but surely we are covering all the minutia in the niche world of sewing machines. I hope you find it helpful.
If you haven’t already, take a moment to check out some of the other articles I’ve recently put out:
Or, you can access the entire archive of articles (25 so far) by clicking on the button below:
Thank you,
-Cale


Thanks, very helpful. I'm also happy to see your final comment about multiple threads on the same bobbin. As a vintage machine aficionado I see this all the time. (I believe 9 is the most colors of thread I've seen on one bobbin.) And I think I used to do it myself long ago. I did it when I only needed a small amount wound on the bobbin, which is silly because it will automatically be poorly wound as a result of going over other thread, not a solid metal surface. But many people did it so as not to waste thread. My question about that is, how often did they ever use those underneath colors? Probably never.
I do enjoy the details you provide and the 'why'. Thanks.
Thanks for the helpful information. I have been sewing for over 60 years and never understood why I sometimes get sloppy bobbins. You are extremely helpful. You are more helpful than my Home Economics teacher back in the 60s.