


How Does a Sewing Machine Make a Stitch?
Learning how a sewing machines works is helpful for sewing machine repair and troubleshooting from home.

How Does a Sewing Machine Make a Stitch?
When a sewing machine makes a stitch, it is essentially tying a knot between the needle thread (upper thread source) and bobbin thread (lower thread source).
The goal of this article is to better understand how the stitch-making process works, so that we know what to look for when things go wrong (e.g. skipped stitches, poor stitch quality, etc.).
I hope you find it helpful.
—Cale
For the sake of this exercise, let’s assume that the machine is threaded correctly and that the we are sewing a straight stitch.
To better explain how a stitch is made, I am going to use a series of animated diagrams taken from the following video:
The video shows how a stitch is made on a vertical rotary hook machine with a side-loading bobbin, such as a Juki TL-18 or a Janome HD9.
However, the stitch-making process essentially remains the same for. . . .
horizontal rotary hook machines with a drop-in bobbin (e.g. most home sewing machines from Janome, Brother, Baby Lock),
vertical oscillating hook machines (e.g. vintage Bernina machines and some modern Bernina machines like the Aurora 440, Virtuosa 153, and the B335),
and vertical rotary hook machines (e.g. vintage Pfaff, Bernina B9 Hook system, Singer Featherweight).
The Stitch Making Process
Let’s assume the stitch-making process begins with the needle in its highest position (it has to start somewhere).
We press our foot down on the foot pedal. The motor turns the machine’s upper shaft and lower shaft.
The needle begins moving downward.
Meanwhile, the machine’s sewing hook rotates around the bobbin case.

The needle moves downward and pierces the fabric.
It passes through the needle plate hole and continues its downward trajectory below the needle plate.

The needle keeps moving downward until it reaches its bottommost position. All the while, the thread is taut along the needle shaft.

The needle reaches its bottommost position and begins its trajectory upward. As it begins to move upward, the thread forms a loop at the eye of the needle (on the backside of the needle).
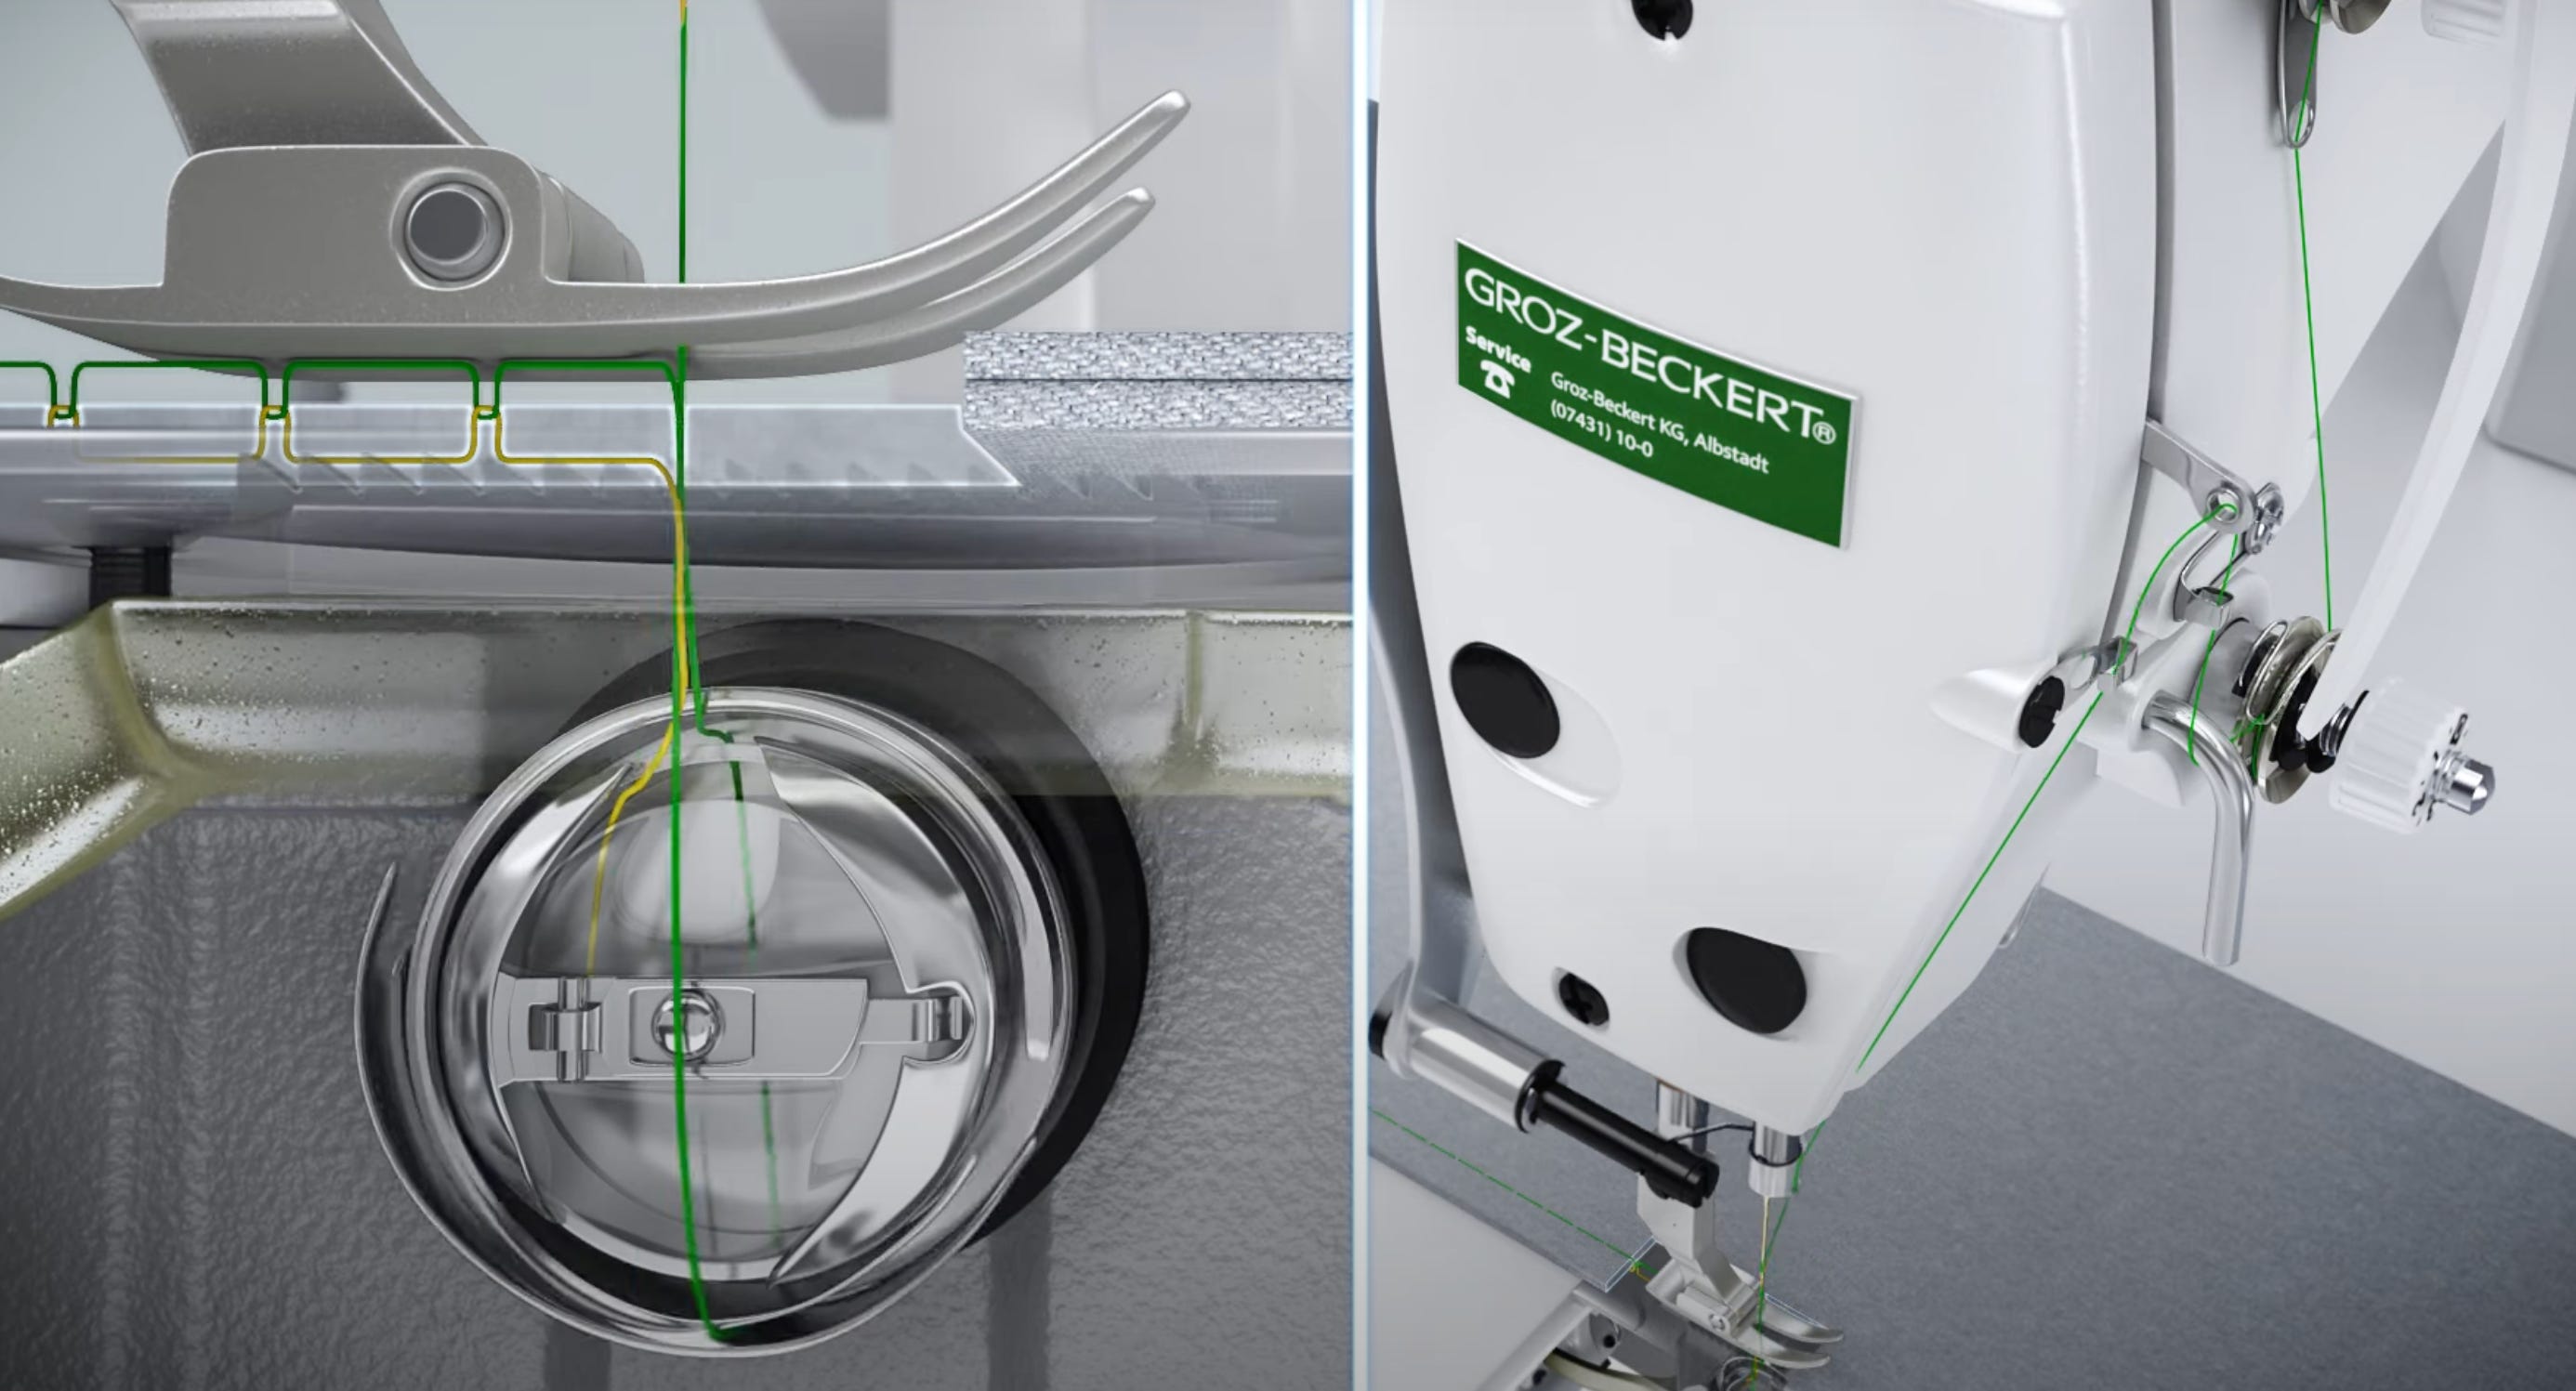
Now, this entire time, the machine’s sewing hook has been rotating around the bobbin case and bobbin. The position of the hook point is timed with the position of the needle, so that the hook point passes behind the needle (just above the needle eye) when the needle has risen approximately 2-2.5 millimeters above the needle’s bottommost position.
This precise timing allows the hook point to pass through (or catch) the thread loop as it is formed. After catching the upper thread loop, the hook continues its rotation around the bobbin case, taking the needle thread along for the ride.

During “the ride”, the upper thread and bobbin thread form a loose knot with each other. This loose knot would forever stay loose and forever stay down beneath the needle plate if not for the take-up lever.
The take-up lever is a critical component on the upper half of the sewing machine. You put the upper thread through take-up lever eyelet when you thread the top half of the machine— then, it’s the movement of the take-up lever that cinches the knot below the needle plate up into fabric.
Below, I’ve put together a series of photos that juxtapose the movement of the take-up lever with the position of the needle and knot formation below the needle plate. Note that the thread knot does not get cinched up into the fabric until the take-up lever swings up to its highest position.


By the time the take-up lever cinches the [thread] knot up into the fabric, the needle is just about at its highest position again (above the needle plate).
The feed dogs then feed the fabric forward a designated length (typically 2-3 millimeters for a straight-stitch), the needle begins moving downward, and the process repeats itself all over again.
I don’t want to oversimplify the complexity of how a sewing machine works. As detailed as we delved with information above, there is still a litany of other factors at play that determine how the stitch sits in the fabric, whether or not the stitch is loose, whether or not the fabric is distorted, etc.
The presser foot holds the fabric down against the feed dogs and needle plate; this firm “sandwiching” of the fabric between the presser foot and needle plate so that the fabric cannot move is critical to the stitch-making process.
The upper tension discs and bobbin case tension discs are playing their role in setting the knot in the middle of the fabric layers.
The size of the needle determines the size of the hole poked through the fabric, which helps determine the position of the thread knot in the fabric.
Whether or not we are using a heavy thread vs fine thread, or high quality thread vs low quality thread, helps determines stitch quality.
The upper thread path being unobstructed— free from compacted lint, shredded thread, burrs, twists, tangles, etc.— is necessary for good stitch quality.
The manner in which the bobbin is wound will help determine stitch quality.
The weave of the fabric contributes to stitch quality.
Matching the needle to the fabric type contributes to stitch quality.


Thank you for reading!
The sewing machine is truly an incredible invention with endless complexity, which is the reason I’ve been able to write over 100 articles for The Sewing Machine Newsletter, with no end in sight.
Remember to check out the archive of past articles which cover all sorts of different sewing machine topics and troubleshooting techniques. Also, if you like this newsletter, please share it with your sewing community. I truly appreciate it.
Thank you,
—Cale
This was really understandable. Thank you! I’ll think about my machine differently the next time I use it.